SpeedoCableInstall
Speedo Cable Installation
Update
Whilst the method below is certainly one way to get the job done (and has some excellent photos), I can confirm that I was able to successfully perform the replacement without any cutting. It is simply a matter of temporarily removing the rubber grommet surrounding the brake feed lines and routing from the front to the back. Refer to the second article.
--Dom. 01:09, 11 January 2010 (UTC)
Here's a nice easy way to make sure you are able to re-route the speedo cable so it fits correctly, and doesn't bind up. Usually when they bind, (you'll read on the forum) most have found a slight clicking noise. This is why: it needs to be routed like this, so there are no Right Angles bending the cable. This procedure helps eliminate the problem. Please email me with questions, I'm glad to help! Greg Silver 78soloX@gmail.com
Original question prompting this: "I searched and all I could really find was a mention about an access holes somewhere near the centre console. I need to know where to access it and should I run the new cable front to rear or rear to front as I have it now. Also, how in the heck do you get the old cable out from the front arear where it is now. BTW, I made the mistake of digging it out of the "firewall and wanking it from underneath so that end is no longer accessible." -Mike Soter
BUT- Mikey, you NEED to be careful and NOT route the cable at a tight right angle, or LEFT angle as it would be on this....it needs to snake nice and smoothly and then directly to the back of the speedo. This is why I wound up using my Dremel, cutting a new hole (since the existing hole has the 3 hoses tight in there) and it works great. Much easier to deal with, too.
Here's photos of the setup I did, and the routing (start at gauge cluster, then run slack under and to the trans)-
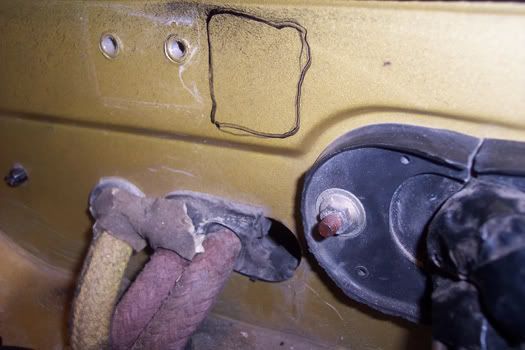
Drawing, cutting hole:
Lower entry hole:
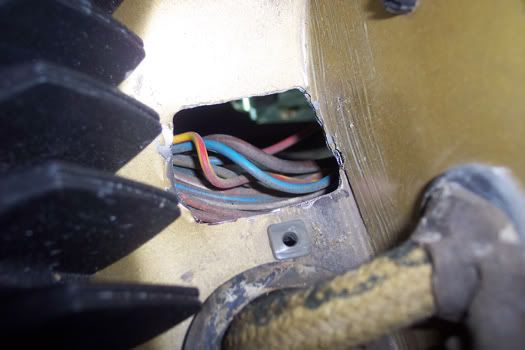
This is where it comes INTO the guage cluster area:
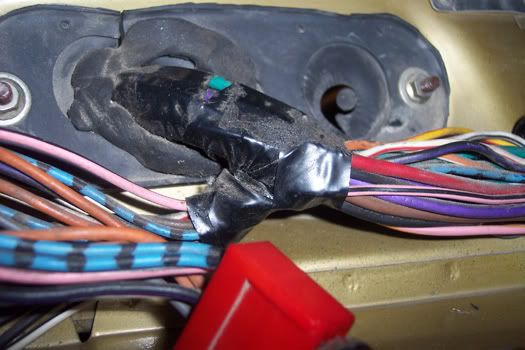
I ran the cable up (under console area, pulled up and out thru firewall, then thru- aimed at back of cluster) and connected it, then wrapped it so the metal edges wouldn't rub and destroy the cable:
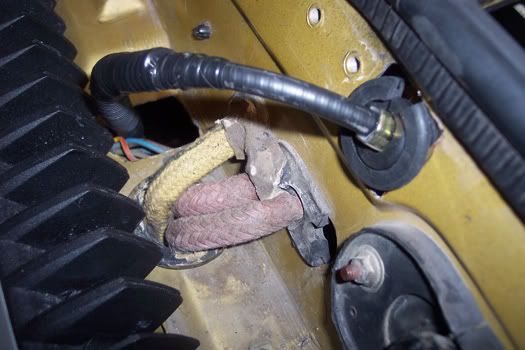
Carefully laid it back into the clips, then tapped it in with a ratchet extension (3/8" x 4") to snug fit:

Looped up and thru the engine bay, it has a nice 6" of extra slack:
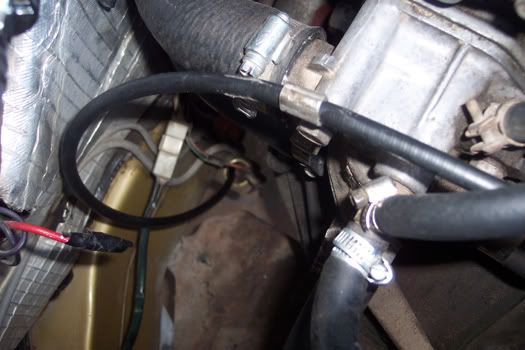
Then you have enough slack to pull the tip out of the cable, about 1" worth, and carefully push it down into the trans end, making sure it seats squarely....then carefully tighten- but remember, its an aluminum nut, and doesn't need much force:

Hope this helps. Not directed just at you Mike, I know you've got miles of tech ability beyond me- but, I'll put this in "Best of" to help anyone else in the future, too.
- -D
Greg Silver
I did this last night for a late model with the 2-piece cable. It really wasn't that bad. Get the car up on 4 jackstands and you may want to remove the steering wheel as you'll be spending some time crawling under the dashboard.
My approach was a little unconventional, but it went pretty well. So with that said.....
The best way to do this is feeding the cable forward, from the dash back to the trans. The metal end of the speedo cable can be fished through the passages, the plastic end cannot. Also, when feeding through grommets, you must get the grommet out of the hole first. The cable will NEVER fit with the grommet in place. Once the cable is through the hole, push the grommet back into place around the cable.
To make routing a little easier, I installed just the sheath, then slid the inner cable in after the fact. You may want to do the all-in-one approach.
Start by removing the little grille in front of the driver's side of the windshield, then dislodge the grommets in the bulkhead for the brake/clutch lines, and also the grommet just below, also for the brake/clutch lines where they head down into the cabin.
Feed the metal end of the cable into the space at the base of the windshield, then through the bulkhead (split grommet) and pull a few feet of cable through.
Now feed the metal end through the round grommet into the cabin. Note that if you go straight into this hole, it will hit the brake/clutch MC hardware. You must angle this cable so it heads towards the center of the car. Once you can fish it through and get it headed somewhat towards the heater core, feed a few feet of cable into the cabin.
At this point, you want to set the location of the plastic end of the new cable. It should be just under the base of the windshield. Hold that in place and feed all off the excess cable into the cabin.
Crawl under the dash and fish the speedo cable into the hole in the floor. This hole is about 1" in front of the throttle pedal, outside of the tunnel. There is a funky split grommet below the car that should be removed for this step. It was a little awkward to get the cable started in that hole. Once the cable is through, feed as much of the cable as possible into that hole, then secure the cable to the buklhead with the existing plastic clip, above the end of the tunnel.
Under the car, clip the new cable in along the tunnel. There are 6 or 8 stout plastic clips for this purpose.
There is a bracket near the bottom of the fuel tank that also secures the cable. Pop out the split grommet and feed the cable up, then replace the grommet.
Arc the cable over the trans & clutch arm. Pull the inner cable out a bit and engage the speedo drive gear, then slide the sheath down and thread on the connector.