Melted Piston.

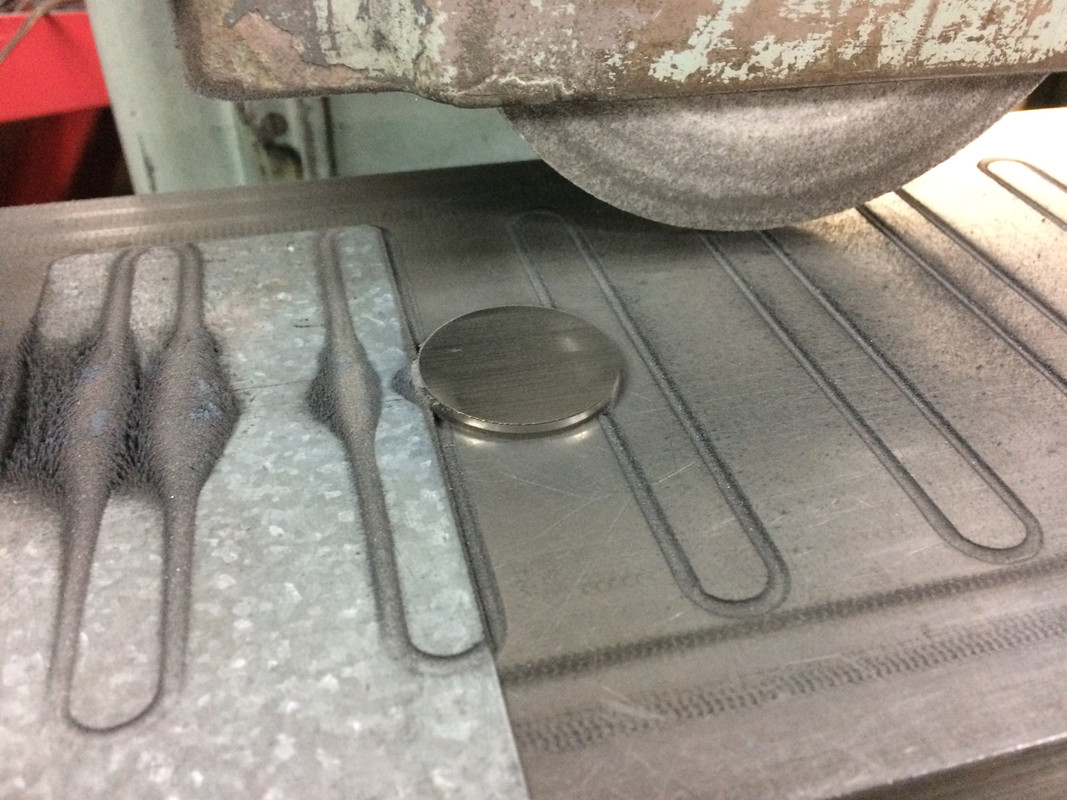
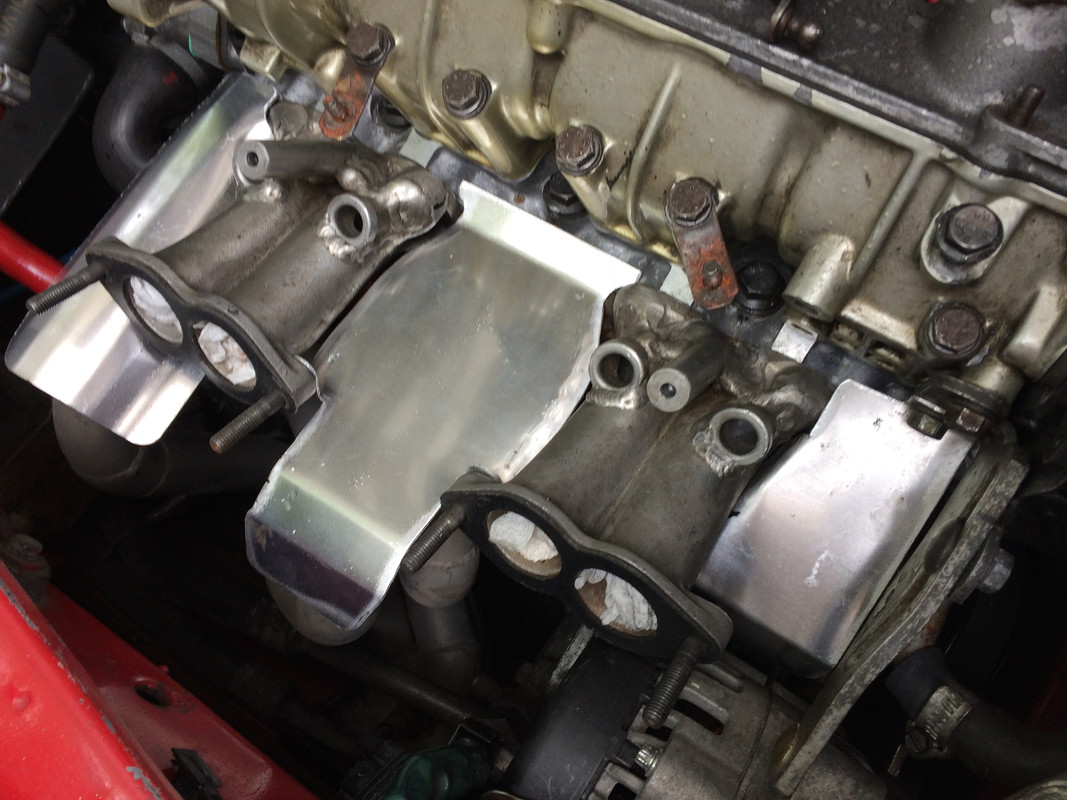
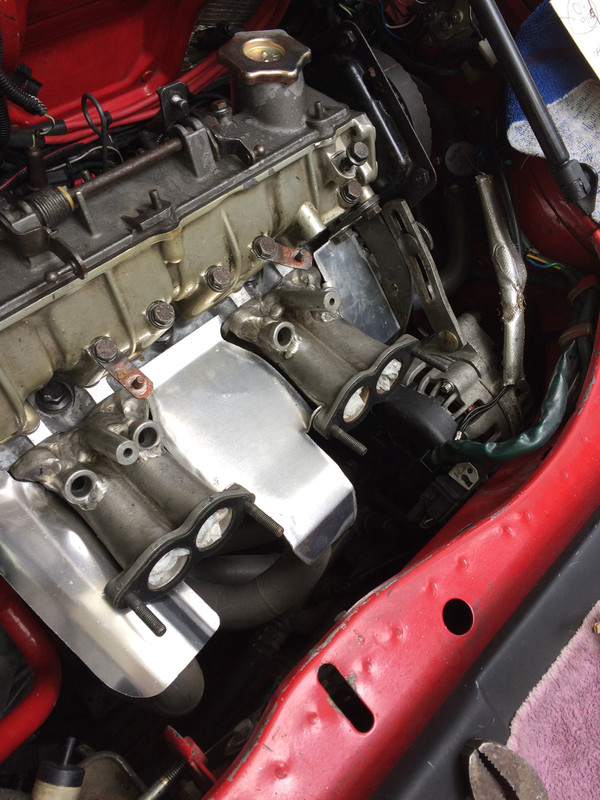
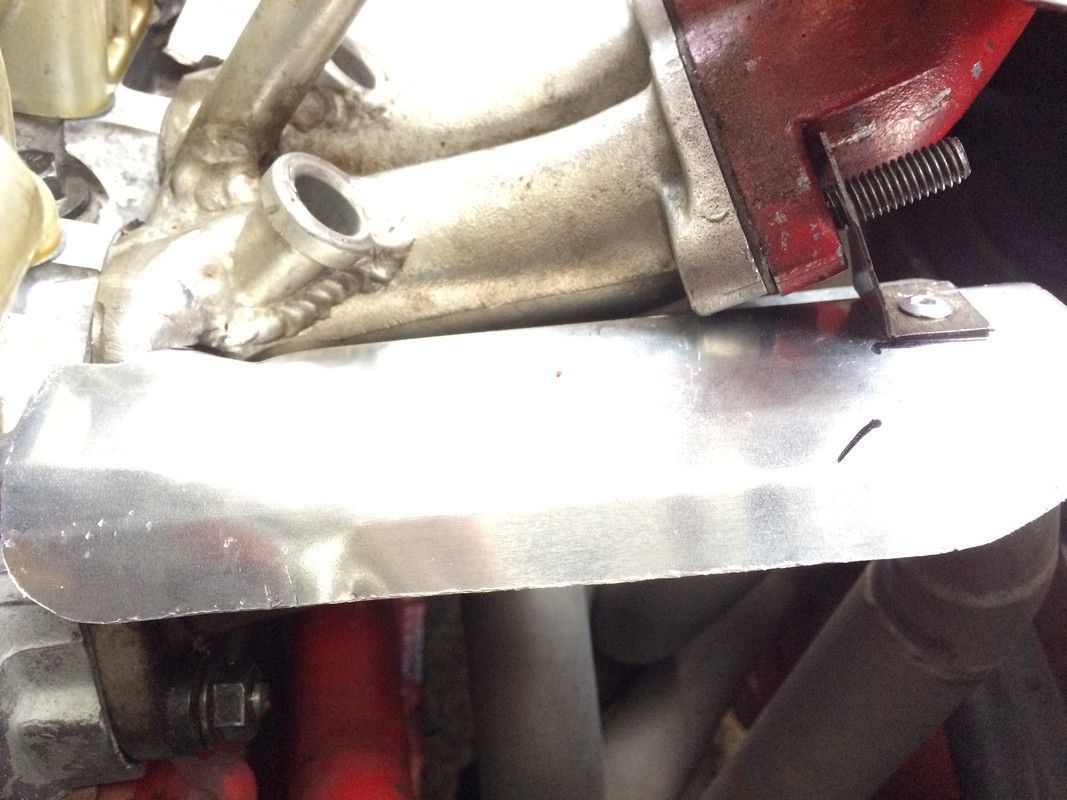
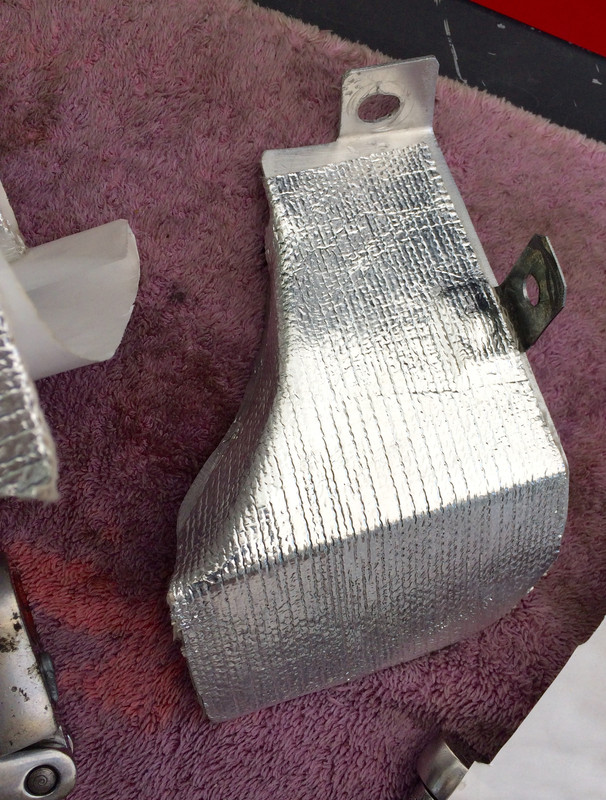
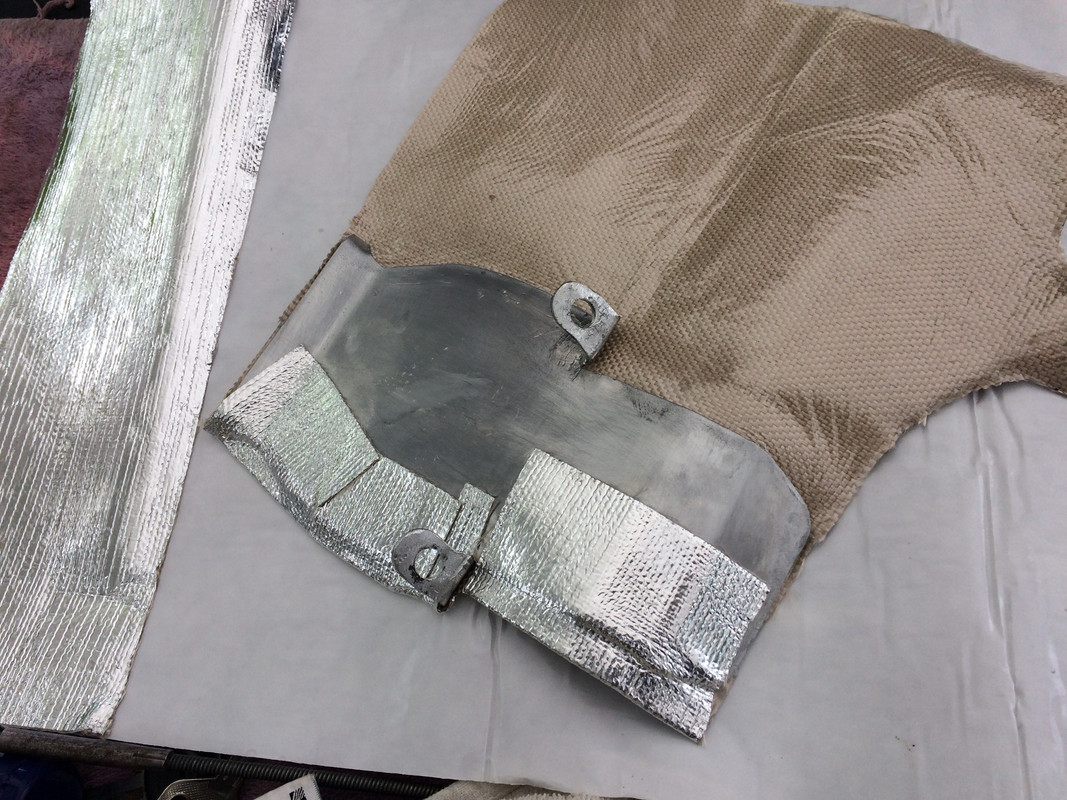
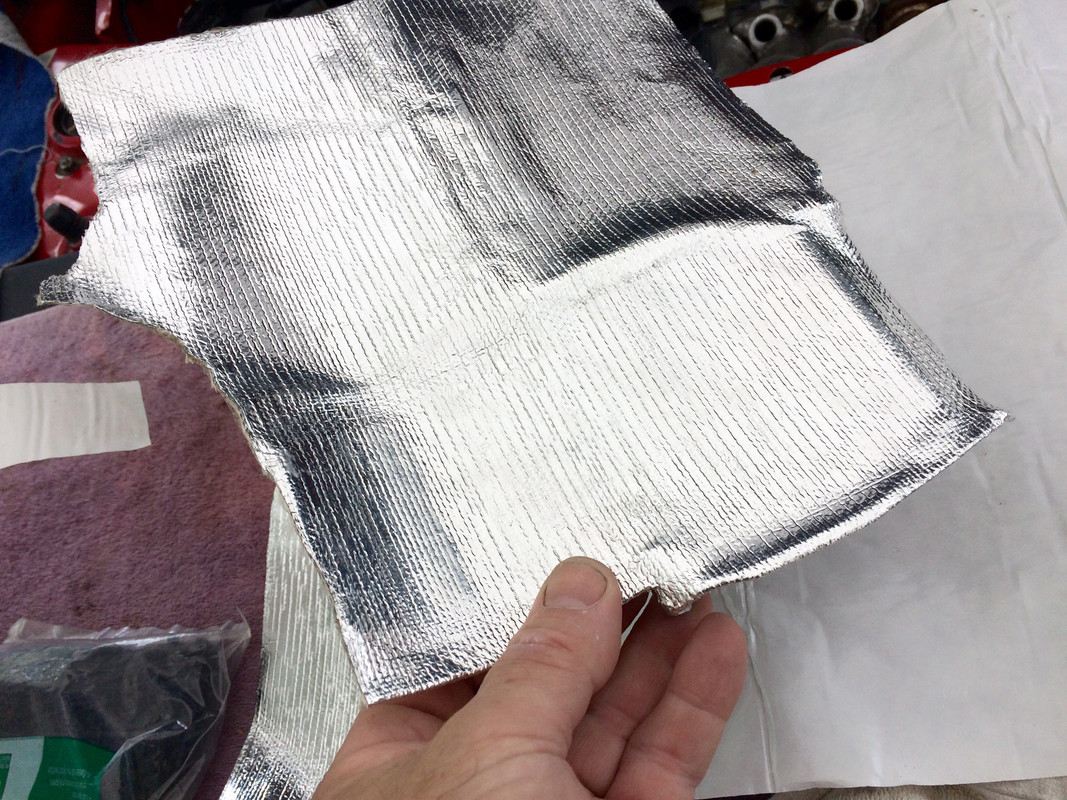
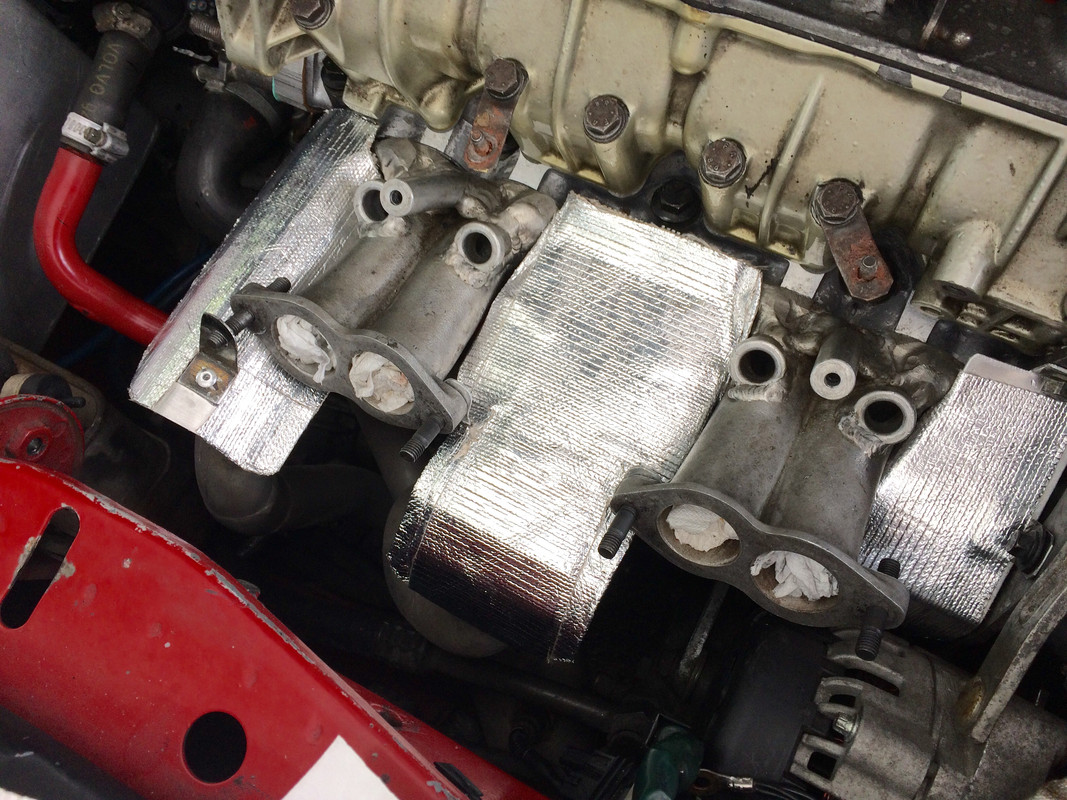
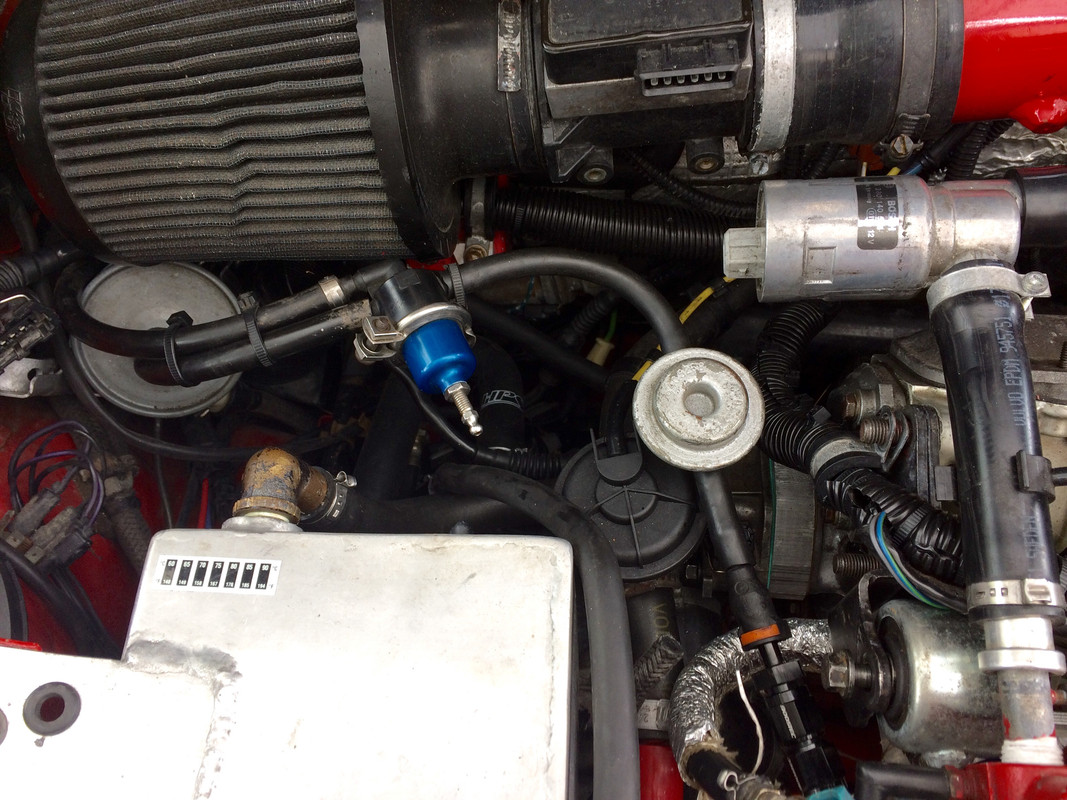
Instead of one contiguous heat shield, consider making three smaller ones and attaching them to the underside of the three components you would want to shield from radiant heat from the header, namely the underside of the two intake runners and the plenum. Look to the motorcycle world for sources of clamp-on exhaust pipe shields.

My theory is that one large shield would hinder air from flow from underneath the engine compartment and from the side scoops, up thru the headers, and out the top thru the engine cover. You have re-implemented your engine cover exhaust fan, but it appears to be on the left side of the cover......if you could move it to the right side directly over the manifolds, I would think that would certainly have to aide in pulling air out of the hottest area of the engine compartment.

You could supplement air flow around the manifolds by using the right side air scoop take-off originally for the alt cooling duct, re-establish that duct, and perhaps mash it up with the stock post-run injector cooling duct T that was originally nestled between the runners, giving you a "breath of fresh air" right into the intake area.
 
Discovered another issue when I went to put the cam box back -

three toasted shims and three wiped cam lobes :(

X19-HG2017-00046.jpg


X19-HG2017-00043.jpg


X19-HG2017-00044.jpg


X19-HG2017-00045.jpg

I'm going to put my old stock cam back in for now. To figure out the proper shim thicknesses, I measured the 35/75 cam base circle - came up with 1.020", and 1.110" for the original cam. If I deduct 1/2 of the difference, (.045") from each of the existing shims, I end up with shims so thin they don't exist

#1: .120" - .045" = .075" #2: .139" - .045" = .094" #3: .146" - .045" = .101" #4: .125" - .045" = .080"
#5: .129" - .045" = .084" #6: .140" - .045" = .095" #7: .138" - .045" = .093" #8: .123" - .045" = .078"
 
Last edited:
Man Hussein, you sure have some tought luck with this engine right now. Sorry about that.
The shims look to me like they have been spinning correctly and the damage does not look like the "worn cam due to improper hardening" damage I have seen before.
There is no evidence of blackening or blueing due to heat, but I would still suspect lack of lubrication. How much have you cleaned the buckets and shims before taking the pic?

First candidate would be upside down headgasket. Other than that, anything special in the oiling department on you engine? Any Volvo parts? :)
 
Disassembly pic from last page:

7A71C740-60B0-4506-A11D-A2647BF8D2D3_zpswsrdjncg.jpg


The hole with the copper ring around it is the oil feed, isn't it?
If so, this would prove that the headgasket was on correctly.
At least this time around.
 
don't know. Could find out (if you dont mind a mess) have someone crank the motor and where ever the oil spews from (will make a mess)
 
?? How did the cam and box get wipped out?? oil pasage blocked with the bad head gasket?

Man Hussein, you sure have some tought luck with this engine right now. Sorry about that.
The shims look to me like they have been spinning correctly and the damage does not look like the "worn cam due to improper hardening" damage I have seen before.
There is no evidence of blackening or blueing due to heat, but I would still suspect lack of lubrication. How much have you cleaned the buckets and shims before taking the pic?

First candidate would be upside down headgasket. Other than that, anything special in the oiling department on you engine? Any Volvo parts? :)

Thanks guys.

My speed shop guy says lubrication. Either oil type or quality, or excessive idle time at low rpm. I have used mostly 5W30 dino oil. Ran synthetic briefly, then back to dino oil when I replaced the pistons last time. Machine shop guy again says I should be using dino oil with zinc additive, Rotella for Diesel application I think was his suggestion. With the LH2.4, base idle is lower than Fiat spec, so perhaps oil pressure at 750rpm is less than ideal, I dunno.. OIl pressure has never dropped to where the warning light would come on though (7psi?). I have a Volvo oil cooler on the motor, all the internal oil pressure related parts are Fiat.

Didn't clean the buckets at all, other than to wipe off the shim cap to write on it with sharpie.

Head gaskets have never been installed upside down - that is easy enough to determine as they have that flat that extends beyond the block surface by #1 cylinder, forward facing edge. On the right side in this pic:

X19_HG2017_00028.jpg


I would think that if it were flipped the oil port to the head would be blocked, since it's offset, no? I always look at the oil passage when I put the gasket on. I don't recall if I primed the motor after each of the HG replacements, perhaps that contributed to cam failure.

I'm going to have to measure the offset of my stock cambox & compare it to the shaved one I've been using that I bought with the cam from MWB. That will give me back some shim depth. I also have one of MWB's extra thick cambox gaskets which I can use if need be. I'll have to see if the machine shop can cut the shims down to depth I need. Problem there is that all the 35/75 base circles are not the same OD, I went with 1.020 for a base line, expecting to adjust the shims once I had them in the ballpark. I have had the cambox on/off two times so far fiddling with available shims & still don't have any gap. Didn't help that the first time I added the .045" instead of subtracting it (!) - the bucket compressor tool won't work when you have no room at the base to remove the shim...
 
Last edited:
Holy cow Hussein! That sucks mate!!!

Perhaps it's time you used ARP head studs?

P1070513.jpg


I'm sure you get better head clamping and more even torque settings that way.

I think this is the parts number list I ended up using...

ARP head studs:
AM4.250-1LB x10 main cap fasteners
301-8352 x1 M16 12 point nuts
200-8598 x1 head bolt bushings
200-8592 x1 washers

Cheers,

Rob
 
dino oil with zinc additive, Rotella for Diesel
At the risk of starting one of the classic "which oil is better" arguments (please don't), just be aware that Shell has reformulated Rotella and it no longer has ZDDP type additives (at least in the US, not sure about other markets). There are other oils that do have it or you can use a separate ZDDP additive if you want something Zink'y. However I was under the impression this was only recommended for the "break-in" of a new cam.

perhaps oil pressure at 750rpm is less than ideal, I dunno.. OIl pressure has never dropped to where the warning light would come on though (7psi?)
Not sure what oil pressure gauge arrangement you have on it, but if it reads from the head, what does (did) your oil pressure gauge read at idle?
 
Hey Hussein. Geez....sorry for all your troubles. But I gotta admire your persistence..

But a couple of things here kinda jump out at me. Firstly, you indicated that you needed shims that are thinner than the smallest available from Fiat. And thus you were going to have your machine shop grind you some thinner ones. DONT DO THAT !!! Use of a shim thinner than the smallest available WILL result in the cam lobe hitting the bucket edges, and will wipe out a new cam in short order !!

Instead, use another cam box that has not been milled and/or mill the cam box until the required shims are in the available stock range.

With the spec of your engine, dont bother using a stock US spec cam. Just get a nice stock euro cam. Pretty easy and cheap to get these days. And good quality.

As for your continual head gasket woes.....well really you gotta stop pissing around with inferior parts. Do the job once and do it right.

My suggestion is....you have a later 14 bolt head correct ?? If so, I reckon a proper OE Fiat head gasket should probably still be readily available in Europe. I think Fiat used that engine type until fairly recently in Tipos or Puntos or something. So probably an OE head gasket is surely still available through the Fiat dealer parts network. Or at least through Ebay or euro vendors. And get some matching new TTY head bolts from the same source. Yeah, it will cost you a few bucks, but these days with the internet, parts from Europe are pretty easy to get, and the euro is weak, and shipping is usually only a few days.

Basically....and I'm sure Steve C will back me up here.....there are 2 basic types of head gaskets. Those that require re-torqueing with regular bolts, and those that are meant to be used with TTY bolts. Mixing gasket types and bolt types is just asking for trouble. Right Steve ? So get both gasket and bolts that are meant to work together. The OE Fiat parts should assure the best quality.

Try to make this your last head gasket replacement......

Good luck, Doug
 
Dan, thanks for the ideas on heat shielding - I will likely fabricate it in three sections simply due to all the compound curves I have to deal with getting around the header & under the runners. #4 exhaust is really close to #4 intake runner. Not sure I'll add any ducting to the right side vent as all that duct work is long gone. Having the fan over on the left still draws plenty of air across from the right side, and there is not space to allow it situated more centrally over #2,3.

Thanks for the input on gaskets & hardware, guys. This last time I used gasket and bolts from one vendor and followed his prescribed torque specifications. Besides the fire ring hanging over the bore, there doesn't appear to be any issue with the gasket type or bolts. I'm going to use the gasket I got from MWB as there is no issue I can see with the fire ring when I test fitted it (14 bolt HD).

Oil pressure is registered at the early setup pressure port down on the back side of the block below the distributor location and close to the oil pump. Oil pressure at 750/800rpm idle (hot) is less than 16psi - this I know because I bought a vdo sender with a 16 psi warning contact by mistake. Besides that who can tell from the cluster gauge...

I'm not going to bother with the stock cam - I ordered a D-223 cam from Matt along with the three shims in the same thickness I removed, in the .130 - .138" range that should be here tomorrow, hopefully early enough in the day for me to put it all back together. I'm leaving for Northern Italy on the weekend, so I don't want to leave it apart.

I realized that if I had put the stock cam in the stock box, the .036" difference in cam offset from the head would have brought the valve clearances into the general range I was looking for. Just not worth doing that.

I have the det can setup hooked up to the block, so once it's back together I can listen to see if there is in fact any knock to be concerned about, or if in fact the problem boils down to the gasket overlap.

Not sure what to do about oil and / or additives yet.
 
Last edited:
Dan, thanks for the ideas on heat shielding - I will likely fabricate it in three sections simply due to all the compound curves I have to deal with getting around the header & under the runners. #4 exhaust is really close to #4 intake runner. Not sure I'll add any ducting to the right side vent as all that duct work is long gone. Having the fan over on the left still draws plenty of air across from the right side, and there is not space to allow it situated more centrally over #2,3.

Thanks for the input on gaskets & hardware, guys. This last time I used gasket and bolts from one vendor and followed his prescribed torque specifications. Besides the fire ring hanging over the bore, there doesn't appear to be any issue with the gasket type or bolts. I'm going to use the gasket I got from MWB as there is no issue I can see with the fire ring.

Oil pressure is registered at the early setup pressure port down on the back side of the block below the distributor location and close to the oil pump. Oil pressure at 750/800rpm idle (hot) is less than 16psi - this I know because I bought a vdo sender with a 16 psi warning contact by mistake. Besides that who can tell from the cluster gauge...

I'm not going to bother with the stock cam - I ordered a D-223 cam from Matt along with the three shims in the same thickness I removed, in the .130 - .138" range that should be here tomorrow, hopefully early enough in the day for me to put it all back together. I'm leaving for Northern Italy on the weekend, so I don't want to leave it apart.

I realized that if I had put the stock cam in the stock box, the .036" difference in cam offset from the head would have brought the valve clearances into the general range I was looking for. Just not worth doing that.

I have the det can setup hooked up to the block, so once it's back together I can listen to see if there is in fact any knock to be concerned about, or if in fact the problem boils down to the gasket overlap.

Not sure what to do about oil and / or additives yet.

Not making sense here. The cam box with the lobes depressing the shim bucket will be under oil, like swimming in it. If there is no oil making it to the camshaft, then sure this could happen, but then the camshaft would gaul to the cam box and a whole other lot of bad things would be apparent not just 3 lobes and shims.

TonyK.

On vacation in Fiji.

I don't understand why just three lobes are toast. It is unclear to me how if lubrication is the issue, why all lobes are not damaged. Cam box has no evidence of galling in any of the journals. When the last work was done on the head (valves recessed) some shims had to be ground to the correct thickness. Perhaps this caused the hardness of the shim to be compromised? They look 'hammered' :(
 
I don't understand why just three lobes are toast. It is unclear to me how if lubrication is the issue, why all lobes are not damaged. Cam box has no evidence of galling in any of the journals. When the last work was done on the head (valves recessed) some shims had to be ground to the correct thickness. Perhaps this caused the hardness of the shim to be compromised? They look 'hammered' :(

Possibly but I would think that the shims were pretty hard all the way through. Reading Al Constantino's book he stated that when he needed thinner shims, he ground a bit off of the valve stem as an alternate choice.


TonyK

Waiting for the ferry from Matamanoa to Nadi Fij
I don't understand why just three lobes are toast. It is unclear to me how if lubrication is the issue, why all lobes are not damaged. Cam box has no evidence of galling in any of the journals. When the last work was done on the head (valves recessed) some shims had to be ground to the correct thickness. Perhaps this caused the hardness of the shim to be compromised? They look 'hammered' :(
 
I don't understand why just three lobes are toast. It is unclear to me how if lubrication is the issue, why all lobes are not damaged. Cam box has no evidence of galling in any of the journals. When the last work was done on the head (valves recessed) some shims had to be ground to the correct thickness. Perhaps this caused the hardness of the shim to be compromised? They look 'hammered' :(

Probably what happened. 3 ground shims, 3 wiped lobes, 3 hammered shims. Most modern engines that still use valve shims put them under the bucket so they don't see much sliding friction type of wear and might get away with this, but since ours are on top of the bucket and definitely get loads of sliding friction wear, anything that would diminish hardness would increase friction and yield the results you experienced.
 
As much of a PITA this is, it could be worse, like this Ford that came into my buddy's machine shop yesterday:
WP_20170628_15_14_39_Pro.jpg
WP_20170628_15_14_27_Pro.jpg
WP_20170628_15_14_51_Pro.jpg


It thrived for over a year on the street and track, until they changed the supercharger pulley to add boost and didn't change the tune to accommodate the extra air, then went to the dyno to see how much more HP it made....as my buddy says, "Not just lean....SIZZLE-LEAN."
 
Futzed around most of the day - took out the pass seat in preparation for replacing the throttle cable, then decided to tidy up the wiring & hard mount the EZK (ign) module. Had to make a right side plate to replace the card/damper that used to block off the fender cavity first, to provide a mount point.

X19_0018a.jpg


Tidier than it was, still kinda messy though.

X19_0018.jpg


Anyway, the D-223 cam arrived mid afternoon, so left the throttle cable uninstalled & set about installing the cam. Got three shims in the thicknesses of those that were wiped to go with it, and a revised version of the valve adjuster tool. Using the standard thin cam box gasket, torqued to spec, I had no measurable clearance. Switched to the "HD" version I got from MWB a couple years ago, uncrushed it's about .020" thicker than the paper version (approx .032" vs .012"). With that in place & torqued to 14ft/lb, the clearances were as follows:

#1 .022" #2 .020" #3 .015" #4 .018" #5 .023" #6 .023" #7 .023" #8 .024"

With that, I was able to swap around 5 of the existing shims, and I got three from a local Volvo shop. Somehow, I still ended up with clearances that need further attention (shooting for .014" across the board):

#1 .013" #2 .018" #3 .015" #4 .016" #5 .015" #6 .014 #7 .014" #8 .015"

Just didn't have the right thicknesses to get #1 (needs .122"), #2 (needs .140") & #4 (needs .131") closer to .014"

Deal with that tomorrow.
 
Last edited:
Jesus christ. I hate adjusting the valves on this motor. Even with the revised BPimm tool, I had to bang it in with a small ball pein hammer, whilst simultaneously making sure the bucket slot moved far enough (but not too far) around to allow the shims to be pried out. For whatever reason, every single one fought me coming out & going in. Using compressed air under the shim didn't work either, I tired (I meant I tried, but I did also grow tired as it happens ;) ).

Redid them again today. After running back & forth to machine shims I got them as close as I'm going to get. I cut down the three that had surface damage from the wear against the cam.

X19_0005.jpg


#1 .015" (.123" shim) #2 .015" (.142" shim) #3 .015" (.143" shim) #4 .015" (.131" shim)
#5 .014" (.1385" shim) #6 .014" (.149 shim) #7 .014" (.146" shim) #8 .014" (.132" shim)

After that, I worked on the heat shields. To allow installation and removal access, I made three (as Dan surmised) separate pieces. The center piece is secured to the back side of the studs used to secure the plenum (flipped the studs around after this pic)

X19_0008.jpg


Forward sheild is secured to the cam box alt. bracket, and with a riveted angle bracket securing it to the alt bracket (added after this pic)

X19_0009.jpg


rearward sheild retained by angle bracket riveted in place.

X19_0010.jpg


I have DEI heat shield wrap - I'm contemplating applying it to the upper surface - It's supposed to face the heat, however I've never had much luck with the material staying bonded over time.

Have to wrap this up tomorrow and install the throttle cable.
 
Last edited:
Finished up the heat sheilds today.

#1 runner shield

X19_HG2017_00042.jpg


wrapping 2/3 shield from the bottom

X19_HG2017_00040.jpg


X19_HG2017_00039.jpg


all three in place

X19_HG2017_00041.jpg


So on to the throttle cable - that's a pita too!

Rerouted the fuel delivery line to get it away from the expansion tank - the old routing wrapped around the tank, which was OK with the plastic tank, not so much with the aluminum. Regulator was between tank & strut tower, was afraid it was getting heat soaked. Lost some access space, but it's not difficult to set the regulator & line aside if need be.

X19_HG2017_00051.jpg


= Changed the oil & filter, now using Valvoline VR1 20W50. See how that goes.
 
Last edited:
So a question in regards to your ground shims.

Are you putting the ground face down into the bucket or facing up towards the cam? If facing up towards the cam, it would seem that the hardened face and surface preparation would be lost and more likely to cause the problem you suffered recently with the galling of the existing parts.

Sorry to see the recent damage and that some of it was the fault of a less than ideal part. Happy it wasn't the fault of the knock sensor and the engine management.
 
Last edited:
Back
Top