new '82 X owner (after 30 years without) general questions

Well here is to some new egg on my face. Going off to do a little learning is apparently a good thing…if embarrassing.

There are really three types of brake fluid generally used. Glycol based, silicone based and mineral oil based.

I have always heard and used the term mineral based for the DOT fluids which is apparently not at all mineral based. DOT fluids are glycol based and is hydroscopic which means it will absorb water and degrade the fluid’s boiling point. However the water is bound so it is less likely to damage the system components (at least as long as it is replaced in a reasonable time period, which by manufacturers recommendation is two years though I am sure many of us fail miserably on this). Both silicone based and mineral oil based fluids do not absorb water however any water in the system will tend to pool in the low areas of the system and cause rust or other corrosion to the system.

In all of these cases the entrained water will degrade braking performance due to the relatively lower boiling point of the water creating compressible steam so even with the hydrophilic fluids one does need to change them. The good thing about the silicone or mineral based fluids you can reuse the liquids one the water has been separated out.

The DOT glycol based fluids have to be discarded as the fluid has been chemically degraded.

Anyway, ‘standard’ or ’synthetic’ DOT glycol based fluids can be mixed. Just not with the other two types of fluid.

Whew…

I know you are asking yourself what uses mineral based oil brake fluid. Mountain bikes, some motorcycles and some old Rolls Royce/Bentleys and unsurprisingly, Citroen (and Maserati for a while when they were part of the Citroen sphere).
Superb and well delivered summation, not to mention most appreciated. I'm thinking WD probably used the same thing on a lot of their refurbs. If I had to guess, based on your categories, I'm thinking they went with DOT. Although, lots of their cars were older...
Sounds like if you're running DOT fluids, the change interval can be stretched out a little?
 
Mineral based…does that include synthetic?

Superb and well delivered summation, not to mention most appreciated. I'm thinking WD probably used the same thing on a lot of their refurbs. If I had to guess, based on your categories, I'm thinking they went with DOT. Although, lots of their cars were older...
Sounds like if you're running DOT fluids, the change interval can be stretched out a little?
They for sure used DOT brake fluid, the question is whether they used DOT3, DOT4, DOT5 or DOT 5.1.

As Karl said while preparing his omelet, DOT3, DOT4 and DOT5.1 are all glycol ether based and compatible with each other. The oddball is DOT5, which is silicone based, and not compatible with the other types. Silicone based brake fluid really is not en vogue anymore, and it would be strange if WD went through all the work needed to convert from the factory spec DOT3 to DOT5.

Regardless, flushing the brake and clutch systems every 2 years is good practice, and much, much less painful than replacing the master cylinders.
 
Last edited:
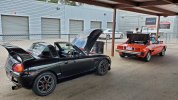
gave the old girl (and old driver) a workout last night at Speedsportz kart track here in Houston.
Did 3 zesty sessions, chasing a Suzuki Capuccino and waving by much newer, faster machines.
Had the Waterfalll 165/70 tires screaming in agony :)
Car did great. Other than the balky 2-3 shift (did improve my heel-toe technique, and barely crunched a few times) and worn lower motor mount (one on order now) she ran like a top and the redone brakes felt excellent. Wouldn't have minded a quicker steering rack but I won't be doing this with the X often, or maybe again.
Once I get the CRX Si back on the road (new fuel pump) will exercise that next time.

Here's in car 3D video, best with headset like Oculus Quest:

Hoping to get drone footage from a guy zipping around the track.

X on track 1.jpg

569A0035.jpg

569A9838.jpg

569A8910.jpg

569A8986.jpg
 

Attachments

  • Image2728644470005121450.jpg
    Image2728644470005121450.jpg
    326.9 KB · Views: 72
  • Image471645814869278328.jpg
    Image471645814869278328.jpg
    351.7 KB · Views: 62
  • Image1214364132404893079.jpg
    Image1214364132404893079.jpg
    383.8 KB · Views: 68
Last edited:
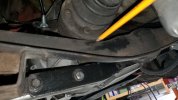
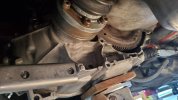
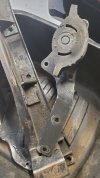
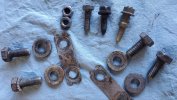
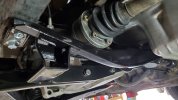
I didn't plan on crawling underneath her so soon after all the jobs I'd wrapped up, but at the track a spectator remarked that the exhaust tips were moving around quite a bit so got her home and inspected the lower motor mount. I was expecting the rubber to be loose/perished and instead found the two mounting bolts gone, and the front stud/nut to be very loose.
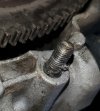
Turned out mount's two bolt-holes in the trans case were stripped (ham-fisted mechanic who last replaced clutch?) so with a lot of great advice and encouragement from Doug ("rx1900", seller of various goodies like ignition wires, engine mounts, screws etc) dove into repairing the threads and installing his mount with custom exhaust support.
Late model mounts with the exhaust arm are NLA, but happy to report that like his ignition wires he provides a top notch product.

Mount kit thread: https://xwebforums.com/forum/index.php?threads/fiat-x1-9-lower-engine-mount-conversion-arm.28369/

On to the pics!

What it looked like, before:
Image8270848783621931294.jpg


buggered bolt holes, and suspect stud (no fluid came out when I removed it, but later drained a bunch out from main drain hole):
buggered.jpg


Bought this M8x1:25 helicoil kit

Also from Amazon: right angle drill, short 21/64 drill bits (regular drill with shorty bits would work if you remove oil pan, which is practically a must IMO, but hey I'm always looking for an excuse to get a new tool...), Irwin tap socket (not much space for T-handle tap holder, this with a ratchet worked great), and from McMaster Carr "3D" i.e. 24mm long helicoils, 3x thread depth as 1D coils that came with kit.

20230414_191917.jpg


Removed oil pan and trans-side of passenger axle, freeing up tons of space (already had a gasket from MWB).
Pretty dark in there, but cylinder walls looked good at least.

bottom end.jpg


Drill, with tape on bit to not go deeper than ~30mm:

drill for re tapping.jpg


tap tap with a little "tap magic" oil, then clear chips with a few blasts of brake cleaner.
Finally, a real use for that little red straw that barely stays in nozzle!

tap for helicoil.jpg


3D/24mm helicoil with new bolts supplied in Doug's kit.
I did get nervous threading in the long coil with the tool that grabs a tang on the very bottom. About 1/2 way in it started to stretch the coil like a clock spring, but eventually got all the coils in the hole.
Looks like the true Helicoil kit comes with a threaded install tool, which may help to work all coil threads in not just twisting the very bottom.

1682294057925.png


installed:
helicoil.jpg


New 8x1.25x38mm front stud. Doug suggested using a Honda part so local dealer looked up exhaust stud for my 1986 CRX Si and it was perfect ($10 for one though!). Part #90026-PTO-000
Trans case threads were good so just installed the new stud using jam nuts, with loctite and some hi-temp sealant smeared around the exit for good measure:
Image502581110302601164.jpg


blasted and POR-15'd the flywheel cover and cross member, then started putting it all back together.
Oil pan install was just as much of a PITA as I anticipated, laying on back, arms cramping, aligning gasket until a few of the ~20 bolts got started....

ready for mount re install.jpg


Complete, with new 4x10mm chassis bolts and Doug's mount and exhaust arm. Now passes the "pencil test"!
complete.jpg


Filled trans back up (took almost the full gallon, maybe 2 cups left over):

trans fluid.jpg


Valvoline VR1 motor oil arrives tomorrow so once that's in she's ready to hit the road again.
Just in time for Radwood at COTA next weekend!

Thanks again to Doug. Fairly scary job drilling and tapping the trans case but thankfully it's soft aluminum and with the oil pan removed has decent clearance.

cheers!
 

Attachments

  • 20230410_155128.jpg
    20230410_155128.jpg
    183.4 KB · Views: 84
  • Image3024647619668339533.jpg
    Image3024647619668339533.jpg
    180.9 KB · Views: 74
  • Image7675116493199790757.jpg
    Image7675116493199790757.jpg
    185.3 KB · Views: 88
  • Image5856056367644828631.jpg
    Image5856056367644828631.jpg
    155 KB · Views: 81
  • Image6537105824758161396.jpg
    Image6537105824758161396.jpg
    419.8 KB · Views: 86
  • done.jpg
    done.jpg
    209.1 KB · Views: 90
Last edited:
I hadn't seen this video until after I used the $15 knockoff helicoil kit, but appears to be the same one as in this video which performs just about as well as the more expensive options:
 
Have only put a few hundred miles on the X since the last post. It's been so damn hot here in Houston only took her out about 1/2 dozen times early in the morning (when it's typically still quite warm and humid) but now planning the next job: exhaust system replacement.
The vintage quad-tipped Ansa system is awesome but fairly rusty, and quite heavy.
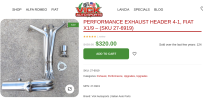
Just ordered the stainless 4-1 header from Vic's (which I'll install), now to decide on the muffler (Borla? Flowmaster? Thrust?) and local shop to weld inlet/outlet pipes and hang it.
Also ordered a stock rear valence from MWB since mine was hacked up for the Ansa's tips.

Also planning on replacing the fuel injectors "while I'm in there".

Will start once this hellish summer is over and highs are merely in the 80s or low 90s.

1694285368686.png1694285647616.png
 
  • Like
Reactions: 86X
Can't say yet how they fit but Vic's SS headers are borderline artwork.
Welds look every bit as nice as ones on the Kleemann headers I put on my dad's CLK55 AMG.

image_50441985.JPG image_50774273.JPG

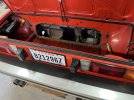
Kind of Fiat to put an access panel in the trunk. Did discover some surface rust under the insulation back there.
Will strip, convert and re-paint.

image_50433025.JPG image_50400513.JPG

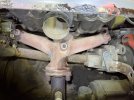
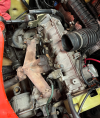
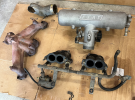
Also good opportunity to clean up the intake and back of block while it's apart.
 
Digging deeper, seeing mission creep...
1694625956698.png

Seems fair to say neither the header nor intake has ever been apart from the motor since they left the Lingotto factory.
2 header nuts were only finger tight, the rest came off without much trouble.

One of the intake runners was significantly blacker and more gunked up than the others. Sign of that injector not working properly?

1694625987650.png

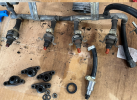
I'd planned on replacing the injectors but seems there were only 2 already-rebuilt ones (from GB Manufacturing) around, other than buying a set for $280 from MWB.
So I'll be sending my 4 off to GB tomorrow for rebuilding, total cost including return shipping but not shipping to CA is $170.
Ordered via Rockauto: https://www.rockauto.com/en/parts/gb+remanufacturing,85213107,fuel+injector,6224

1694626120255.png

Already have the fuel hose from MWB, and Oediker-style clamps.

Will also replace the original injector connectors with these: https://www.amazon.com/gp/product/B07C7QSQBY/ref=ppx_yo_dt_b_asin_title_o02_s00?ie=UTF8&psc=1

Borla 40352 muffler (2.5" in/out), flex pipe and V-Clamp arriving this weekend.

Will also probably replace the coolant hose coming off the water pump pipe, and clean the pipe up. Great access while everything is off.
 
Mission creep continues...
Replacing all coolant hoses and the radiator while it's up in the air and apart.
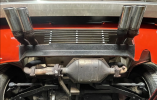
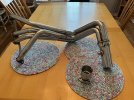
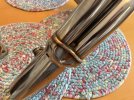
Bittersweet pulling the Ansa system out today. 53lbs vs 25lbs for Vic's headers, Borla and misc fittings but it was such a rad, period mod that someone (original owner?) surely spent a pretty penny on and was very proud of.

image_50432257.JPG


Now to find a source for replacement insulation over the muffler and between motor and trunk.

thumbnail.jpeg


Is the quad tipped Ansa worth anything? A few small rust holes but otherwise intact. Hate to throw it away but would take up valuable garage space...

thumbnail (1).jpeg
 
  • Like
Reactions: 86X
Digging deeper, seeing mission creep...
View attachment 77299

Seems fair to say neither the header nor intake has ever been apart from the motor since they left the Lingotto factory.
2 header nuts were only finger tight, the rest came off without much trouble.

One of the intake runners was significantly blacker and more gunked up than the others. Sign of that injector not working properly?

View attachment 77300

I'd planned on replacing the injectors but seems there were only 2 already-rebuilt ones (from GB Manufacturing) around, other than buying a set for $280 from MWB.
So I'll be sending my 4 off to GB tomorrow for rebuilding, total cost including return shipping but not shipping to CA is $170.
Ordered via Rockauto: https://www.rockauto.com/en/parts/gb+remanufacturing,85213107,fuel+injector,6224

View attachment 77301

Already have the fuel hose from MWB, and Oediker-style clamps.

Will also replace the original injector connectors with these: https://www.amazon.com/gp/product/B07C7QSQBY/ref=ppx_yo_dt_b_asin_title_o02_s00?ie=UTF8&psc=1

Borla 40352 muffler (2.5" in/out), flex pipe and V-Clamp arriving this weekend.

Will also probably replace the coolant hose coming off the water pump pipe, and clean the pipe up. Great access while everything is off.
LOL, my mission does not creep it is in a flat out sprint.
 
Mission creep continues...
Replacing all coolant hoses and the radiator while it's up in the air and apart.
Bittersweet pulling the Ansa system out today. 53lbs vs 25lbs for Vic's headers, Borla and misc fittings but it was such a rad, period mod that someone (original owner?) surely spent a pretty penny on and was very proud of.

View attachment 77354

Now to find a source for replacement insulation over the muffler and between motor and trunk.

View attachment 77355

Is the quad tipped Ansa worth anything? A few small rust holes but otherwise intact. Hate to throw it away but would take up valuable garage space...

View attachment 77356
I would think someone would defiantly want that old exhaust.
 
That does look nice. Did you reinstall the stock aluminum sheets or just leave it like that?
What muffler did you use with those headers? Any pics of the finished job?
Cool green color BTW!
No, I just used the old sheet as a template to cut the new mat, but nothing stopping you from applying it to the stock sheet either. The muffler is stock (no cat). I have zero tolerance for drone so I'd rather chance a slight restriction than deal with that annoyance. It works well and basically sounds stock. This color green is extremely rare. It's rare because nobody in their right mind would have walked into a showroom and said I'll take it. I've only found one other in this color. It was the subject of an article, a barn find I think, and the writer loved the car but mocked the color too. The color you see underneath is just a not so close Rust-Oleum color. You can see the actual color in my build thread:


Fiat had some very desirable greens in their line-up over the years, but this was not one of them. My '74 is a 358 green which is an outstanding look, but on this '75 it didn't warrant everything involved in doing a color change, so it will stay with a color that belongs on some old, nondescript UK sedan.

If you decide to use something like the tunnel shield, you might consider removing your trunk panel to get rid of the attic insulation and cover the bottom of the removable panel with the mat. The insulation in there is notorious for retaining moisture and rotting the panel below it. Heck, it's just a little more mission creep!

index.php
Really enjoyed reading through your thread, and for the record I like that green. Maybe not as much as the lighter shade but still cool.

Yeah the "attic" insulation on mine is gross. Definitely trapped moisture, causing some moderate rust on the panel between muffler and trunk.
Was one 48"x21" piece of that Boom Mat enough to do the large piece above the muffler, and also the front side of the lower opening and upper access panel?
I just took some measurements and doesn't seem like enough.

I just ordered a can of that Eastwoods Rust Encapsulator (red) you recommend. Pricy stuff but nothing but the best for my baby Ferrari ;)
Will hit it with wire wheel, rust converter, then the Eastwood.
cheers!
 
I just ordered a can of that Eastwoods Rust Encapsulator
Rust can't be totally eliminated with a wire wheel or sanding. Media blasting works, but is usually a major mess and impractical for smaller jobs. Rust 'converters' only turn the top layer of rust to iron oxide. If you apply a converter to a rusted area, let it dry, and hit it with a wire wheel you'll see it is still rusted underneath, so it's not the only step in the process. Rust encapsulator seals out air and moisture quite well, but Eastwood has changed the formula recently. Make sure you read the directions carefully. The new formulation starts to rapidly cure when opened and any residue on the edge of the lid or can rim will virtually weld it shut. If you bought the spray can, no worries, but if you are using the quart can, I would carefully use a brush for application for anything other than outer body panels. If applying under 2K primer on a body panel, I'd plan out how to use most of the quart in one spraying session.
 
Back
Top