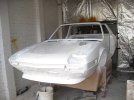
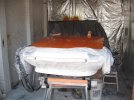
What did you do to your X1/9 today ?

Getting ready to chase a constant key-off full 12v draw on the '75.

  • It's not the alternator.
  • It's not the starter.
  • It's not the radio memory/clock.
  • It's not the courtesy light.
  • It's not on any fused circuit.

Everything on the X operates properly and nothing operates in the key-off position that shouldn't. This should be a real adventure, probably involving some body contortions not normally found in nature......

Interesting for sure, do you have any idea how much current it's pulling?
 
I feel I'm blowing up this thread with this cowl ordeal, but the alternative is a thread that'd probably be best named "youngin complains endlessly about a minorly inconvenient but common auto restoration task"

Anyway

Just to confirm the above suspicions, wow, take a look at this mess. Mud and debris, which was not immediately apparent given only the center section beneath the latch is like this. It rusted through the first of two layers where the "hood" for the HVAC inlet is welded to the body. Hopefully I can get by without laying new sheet metal, as the actual cowl layer is hardly eaten into.

PXL_20221219_031831497.jpg
 
Last edited:
OH. That is concerning alright.
Yes it is. My immediate thought was the ignition switch had a sticking contact, but if that was the case the coil + would show voltage and anything switched would operate in the key off position which is not the case. Something that is unswitched is drawing some serious voltage but nothing is on that I can find on a quick first pass.
 
Getting ready to chase a constant key-off full 12v draw on the '75.

  • It's not the alternator.
  • It's not the starter.
  • It's not the radio memory/clock.
  • It's not the courtesy light.
  • It's not on any fused circuit.

Everything on the X operates properly and nothing operates in the key-off position that shouldn't. This should be a real adventure, probably involving some body contortions not normally found in nature......
Where are you measuring 12V where it should not be with the key off? Have you measured the current draw at the battery?
 
I've always wondered about the likelihood of one of the many through-body, sharp bends the battery to starter wire makes cutting through the insulation and leading to a dead short. If i remember right there's also some very questionable routing going on in the center tunnel part of the spare tire well.
 
Where are you measuring 12V where it should not be with the key off? Have you measured the current draw at the battery?
Between the negative cable and the negative post of the battery. There should be zero voltage other than a periodic draw for the radio memory, but the radio harness is disconnected. Can't be a dead short otherwise something would be melted or the car would be in ashes by now. Everything on the car operates normally, but if the negative cable is not removed it will pull down the battery in short order. Usually this turns out to be a bad alternator diode, but there is no change with the alternator harness completely unplugged. No change with an empty fuse panel either. A genuine puzzler.
 
Found it. Luckily I have a multiple connection positive cable end so I can disconnect the main positive cable separately from the main ignition feed. The main cable only feeds the starter so there is an issue there, or the cable is lightly contacting ground. Won't know until I get underneath it tomorrow to check it out completely. Should be a no-brainer from here, but I'll post what the ultimate fix is.
 
How did you do that test to discover it in the first place?
You remove the negative battery cable from the post and place a voltmeter between the cable end and negative post. On pre electronic laden cars there should be no voltage detected. If there is a voltage reading reading something is either "on" or a positive wire or connection is finding a path to ground. If you have a radio or clock installed you will have a random voltage (usually 5v) for a couple seconds and then drop back to zero which is normal. On modern stuff there is a higher level of parasitic drain present due to the number of electronic components that require memory, so you need to refer to the manufacturers spec to determine if the draw is within limits. The culprit in my case was found at the main connection post at the starter. The only wires on that post are the positive battery cable and the charge wire to the alternator. The connector on the charge wire had some degraded insulation and was barely touching the starter housing, but enough for straight battery voltage to arc to ground. Luckily the resistance on it's path to ground was high so it just drained the battery; had there been a solid path to ground it would have caused some very serious damage.
IMG_5018.jpg
 
Last edited:
You remove the negative battery cable from the post and place a voltmeter between the cable end and negative post. On pre electronic laden cars there should be no voltage detected. If there is a voltage reading reading something is either "on" or a positive wire or connection is finding a path to ground. If you have a radio or clock installed you will have a random voltage (usually 5v) for a couple seconds and then drop back to zero which is normal. On modern stuff there is a higher level of parasitic drain present due to the number of electronic components that require memory, so you need to refer to the manufacturers spec to determine if the draw is within limits. The culprit in my case was found at the main connection post at the starter. The only wires on that post are the positive battery cable and the charge wire to the alternator. The connector on the charge wire had some degraded insulation and was barely touching the starter housing, but enough for straight battery voltage to arc to ground. Luckily the resistance on it's path to ground was high so it just drained the battery; had there been a solid path to ground it would have caused some very serious damage.
yikes, good thing the mystery is over then. What setting on a multimeter would you use?
 
It appears that brake fluid hoses were indeed the likey cause, whether that's fluid, debris, or both. The rust narrows down to the path of the hoses, and stops right where they go through the cowl to the horrid kink into the cabin.

Also, there is NO access to the middle section of the cowl for scraping off this undercoating. At the very least, a trick I learned just now is that the phosphoric acid in my rust converter seems to react fairly strongly with the undercoating, breaking it down.

Hopefully painting it goes more smoothly.
Had the exact same thing on my Rust free 85, scraped up the coating, sanded and wire brushed teh rust, encapsulated it with POV15, coat of paint over that when it was still tacky and then two coats of asphalt undercoat spray. I will be monitoring it to see what happens.
 
I feel I'm blowing up this thread with this cowl ordeal, but the alternative is a thread that'd probably be best named "youngin complains endlessly about a minorly inconvenient but common auto restoration task"

Anyway

Just to confirm the above suspicions, wow, take a look at this mess. Mud and debris, which was not immediately apparent given only the center section beneath the latch is like this. It rusted through the first of two layers where the "hood" for the HVAC inlet is welded to the body. Hopefully I can get by without laying new sheet metal, as the actual cowl layer is hardly eaten into.

View attachment 68919
I didn't have nearly the issue you have, but there was some rust that was confined to under the brake and clutch reservoir areas.

Sanded back to good then applied POR15's Metal Prep. Don't have pix but then applied POR15's coating, then topped off with 3M undercoating-in-a-can. That was in '08, still good. in 2022.


IMG_0198.JPG


IMG_0199.JPG


IMG_0200.JPG


IMG_0201.JPG


IMG_0206.JPG


IMG_0207.JPG
 
Found it. Luckily I have a multiple connection positive cable end so I can disconnect the main positive cable separately from the main ignition feed. The main cable only feeds the starter so there is an issue there, or the cable is lightly contacting ground. Won't know until I get underneath it tomorrow to check it out completely. Should be a no-brainer from here, but I'll post what the ultimate fix is.
and that was the issue - that wire was touching something it shouldn't have had?
 
I didn't have nearly the issue you have, but there was some rust that was confined to under the brake and clutch reservoir areas.

Sanded back to good then applied POR15's Metal Prep. Don't have pix but then applied POR15's coating, then topped off with 3M undercoating-in-a-can. That was in '08, still good. in 2022.


View attachment 68931


View attachment 68932


View attachment 68933

View attachment 68934


View attachment 68935

View attachment 68936
That looks very good, seems the factory coating is holding on for the majority of it too. I pretty much had to strip all of the factory coating, so I'm on the fence about what to do.

I like kmeads idea of regular paint, so I can more closely see the condition of it, but I think it'll need some undercoating or seam sealer along the rear of the cowl, to prevent water from ending up in the seam.

I may end up doing a little bit of both, I guess we'll see.
 
Had the exact same thing on my Rust free 85, scraped up the coating, sanded and wire brushed teh rust, encapsulated it with POV15, coat of paint over that when it was still tacky and then two coats of asphalt undercoat spray. I will be monitoring it to see what happens.
Interested to see for sure, the rust has finally been converted, now just to repaint. I'm thinking primer, base coat (to seal) X2, then undercoating where needed to keep the body sealed up (around the seams).

I could also use the unibody seam sealer I have here, the proper product for sealing up the seams at the edges, and more similar to the factory coating. Not sure....
Well, I wire brushed it but rust was still there so the encapsulator was needed. I only prime and paint if I know I got all the rust. If I was doing it again I now have a cheap small sand blaster which could have removed all the rust especially in the hard to reach areas. If I did this I would have seam sealed the edges and primed and painted then sprayed on the undercoating or truck bed liner.

I find as a progress with the restoration that my skills, equipment and knowledge all grow and what I did last year might be done differently this year.
 
Back
Top