You are using an out of date browser. It may not display this or other websites correctly.
You should upgrade or use an alternative browser.
You should upgrade or use an alternative browser.
Working on the House....
- Thread starter lookforjoe
- Start date
lookforjoe
True Classic
added a stud to support the sheetrock patch, reinstalled the lath, sheetrocked the wall, and ran wiring for another outlet on that side of the chimney. Cut & fit the last panel on the ceiling

have to do all the plaster work against the chimney, spackle the ceiling joints, remove all the wall hanger strips & either make a bookcase, or have one made. I have a good friend who is a retired carpenter, so he may be willing to make one for me

have to do all the plaster work against the chimney, spackle the ceiling joints, remove all the wall hanger strips & either make a bookcase, or have one made. I have a good friend who is a retired carpenter, so he may be willing to make one for me
Last edited:
lookforjoe
True Classic
Oh my. Looks a lot easier on the home renovation shows. You get blasted by yesterday's blizzard?
Only 6-8 inches or so here, not that bad.
lookforjoe
True Classic
still plugging away on the plaster & spackle work.
Cleaning up prior to putting down tarp

This corner needs significant work to clean up the wall. Its going to be covered with a floor to ceiling bookcase, however I still want it straight.
I also cut an old brick & filled in the cut back where they had put an outlet in the chimney face about 2/3rds the way up. Have to wire brush all the bricks & seal the surfaces

Much mess yesterday with most of the sanding done

Ceiling is done, just have to finish painting it. Seams are all pretty good - minimal evidence in a couple spots, not enough to bother me

Cleaning up prior to putting down tarp
This corner needs significant work to clean up the wall. Its going to be covered with a floor to ceiling bookcase, however I still want it straight.
I also cut an old brick & filled in the cut back where they had put an outlet in the chimney face about 2/3rds the way up. Have to wire brush all the bricks & seal the surfaces
Much mess yesterday with most of the sanding done
Ceiling is done, just have to finish painting it. Seams are all pretty good - minimal evidence in a couple spots, not enough to bother me
Last edited:
lookforjoe
True Classic
Most of the plaster & spackle work is done now. We decided to go with an accent wall - this matches the back walls of the kitchen on the right & my work space in back on the left

Last edited:
lookforjoe
True Classic
I installed kitchen cabinets for my sister and her husband today. 12 cabinets, some with an outlet in the back. An oscillating tool is your friend.
Definitely ready for bed.
Three more upper cabinets tomorrow and then off to home.
You are a better man than I. I wouldn't consider that kind of work for a family member, besides my mother
Ann & I worked on painting the ceiling, walls & starting on the trim today.
tvmaster
True Classic
love the bold colour choice.Most of the plaster & spackle work is done now. We decided to go with an accent wall - this matches the back walls of the kitchen on the right & my work space in back on the left
View attachment 58076
lookforjoe
True Classic
My Saturday and Sunday’s work. Not exactly perfect but we came close.
Nice work, Karl!
Are you doing the tile work as well? Curious - why 3 outlets stacked like that?
kmead
Old enough to know better
ThanksNice work, Karl!
Are you doing the tile work as well? Curious - why 3 outlets stacked like that?
No no tile work, it was existing and a mistake on their part to keep it. There will be future pain to rectify that.
The three outlets are that way to allow power in the cabinet which hasn’t been placed yet, for above the counter that will be on top of that cabinet and finally in the upper cabinet to power under cabinet lighting.
Leaving the old tile work was a cost saving choice but some poor measurements for the cabinets plus some crappy tile installation will make the quartz counters a pain as well as require lots of trim to cover the edges.
lookforjoe
True Classic
Wrapping up the main work in the living room. Have to build or have built a bookcase that will go on the outside wall behind the armchair instead of the accent wall where we used to have them. Have to get new curtains, and new couch cushion upholstery to coordinate with the new room color


Last edited:
lookforjoe
True Classic
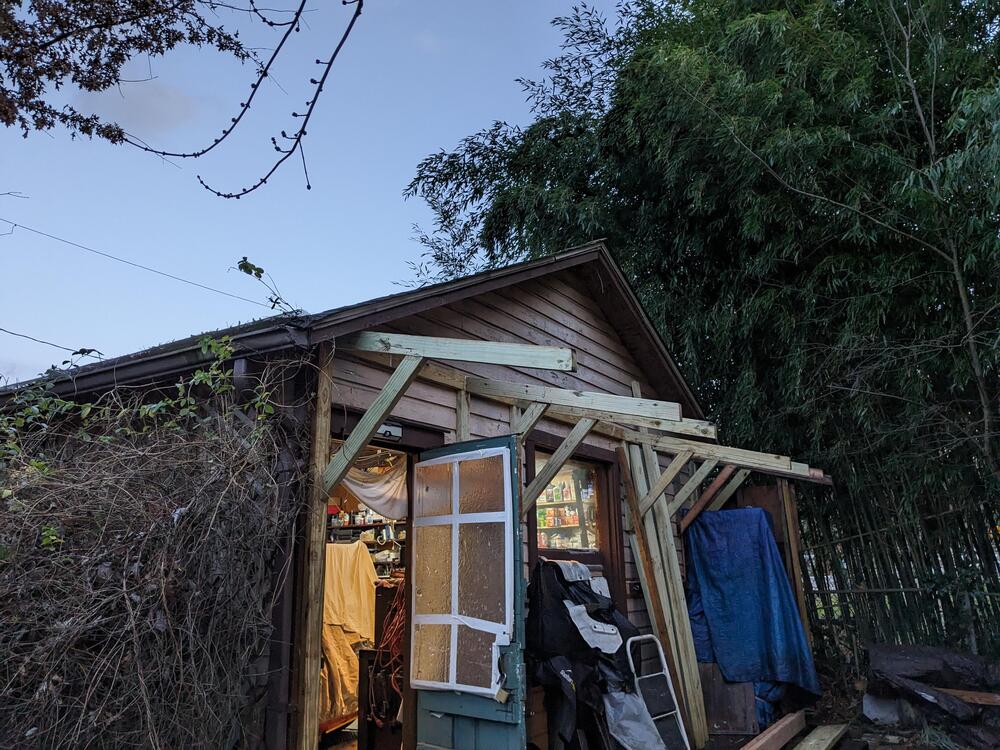
Adding the Garage work here. Need to make space for the new 80gal compressor, so I made a platfrorm behind the garage for the engine hoists, press, and other large equipment. Now I need an awning to protect all the stuff & make it accessible & some minimal level of overhead protection in the winter & rainy months.
Added an end panel , and anchored the press.

added a header, and an end rafter - looked online for a guide to appropriate pitch for the awning. Basic minimum rule seems to be 1/4" for every foot. I made the awning 50" deep, with a 6" drop - so well over minimum spec - "looks' reasonable to me.

picked up some lumber & corrugated panels

To get the pitch, I cut 15º on the rafters, then 45º & 30º for the 3' angle section, that put the brace around 1/2 way out the rafter. It's only carrying the weight of the corrugated panels, so I think it will be fine.

The plan is to put the rafters/braces 24" on center, since that aligns with where the studs are in the garage wall. The corrugated panels are 26" W, I'm planning on about a 4" overlap

Had time to make & put up 4 supports before I had to pack up, and caulked the header at the wall, since I don't have time to do the drip rail, etc, before the rain forecast for all day tomorrow & Monday

I realized the one by the garage entry dropped when I mounted it to the stud, the pitch angle is obviously off in this pic

So I corrected that when I got home from the party we were attending, was only a couple hours, so the construction adhesive had not set yet

The problem Is I need to figure out a way to attach rafters over the window, otherwise I will not have rafters to support the central roof panels

Outside the door on the frame, I need to add a support to hold the outermost rafter & brace. Have to cut off some of the existing door overhang

Added an end panel , and anchored the press.
added a header, and an end rafter - looked online for a guide to appropriate pitch for the awning. Basic minimum rule seems to be 1/4" for every foot. I made the awning 50" deep, with a 6" drop - so well over minimum spec - "looks' reasonable to me.
picked up some lumber & corrugated panels
To get the pitch, I cut 15º on the rafters, then 45º & 30º for the 3' angle section, that put the brace around 1/2 way out the rafter. It's only carrying the weight of the corrugated panels, so I think it will be fine.
The plan is to put the rafters/braces 24" on center, since that aligns with where the studs are in the garage wall. The corrugated panels are 26" W, I'm planning on about a 4" overlap
Had time to make & put up 4 supports before I had to pack up, and caulked the header at the wall, since I don't have time to do the drip rail, etc, before the rain forecast for all day tomorrow & Monday
I realized the one by the garage entry dropped when I mounted it to the stud, the pitch angle is obviously off in this pic
So I corrected that when I got home from the party we were attending, was only a couple hours, so the construction adhesive had not set yet
The problem Is I need to figure out a way to attach rafters over the window, otherwise I will not have rafters to support the central roof panels
Outside the door on the frame, I need to add a support to hold the outermost rafter & brace. Have to cut off some of the existing door overhang
lookforjoe
True Classic
Figured out a way to deal with the rafter supports in the window space . I'll add studs to provide a support. Still need to figure out the one over the door

Added two more rafter braces before the rain came in this morning, covered up my equipment

Added two more rafter braces before the rain came in this morning, covered up my equipment
Steve Thomas
True Classic
run a hanging beam between the supports either side of the door and plonk the rafter on top of itStill need to figure out the one over the door
lookforjoe
True Classic
lookforjoe
True Classic
Had time to add the sub facia, at least the 14" section. I used joist hangers on the 3 rafters without braces, at the header
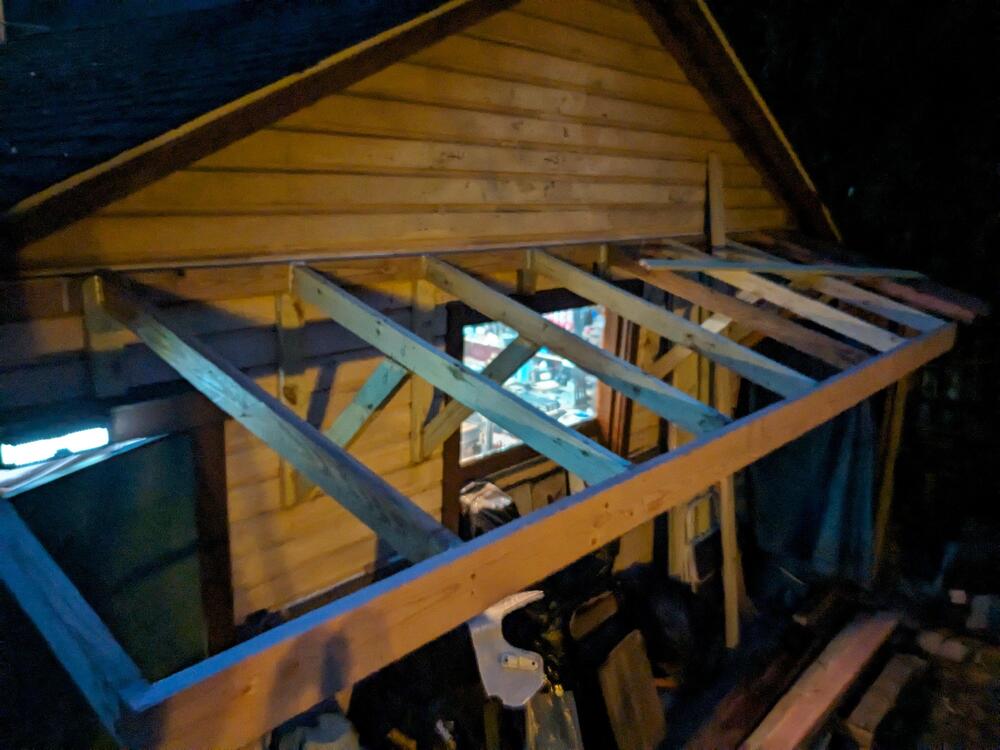
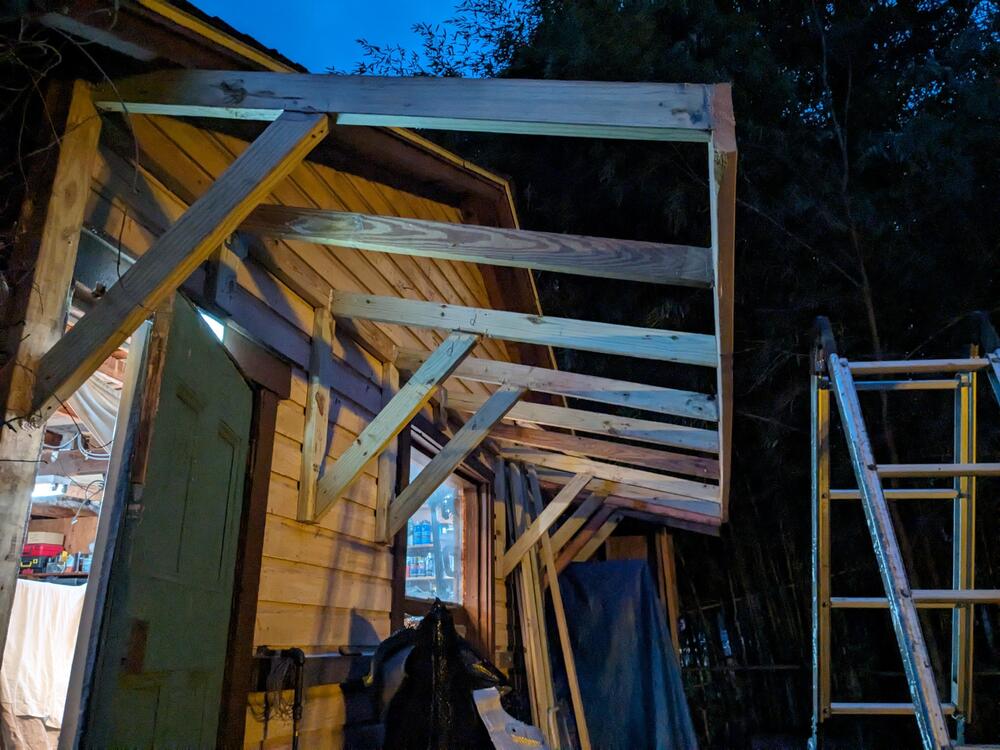
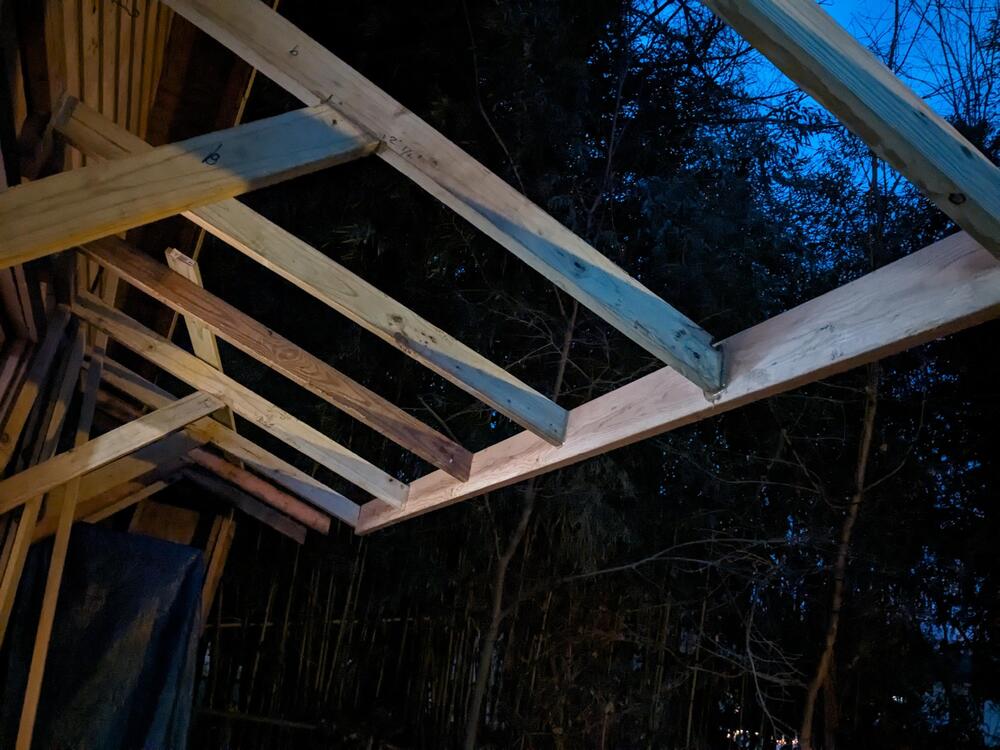
Wondering if I should add hangers on the same 3 rafters at the sub facia, for additional support. I have to add a 4' sub facia on the end - I figured I should add angle brackets to tie the 2 sub facia sections to the rafter, since they sit midway on the rafter end
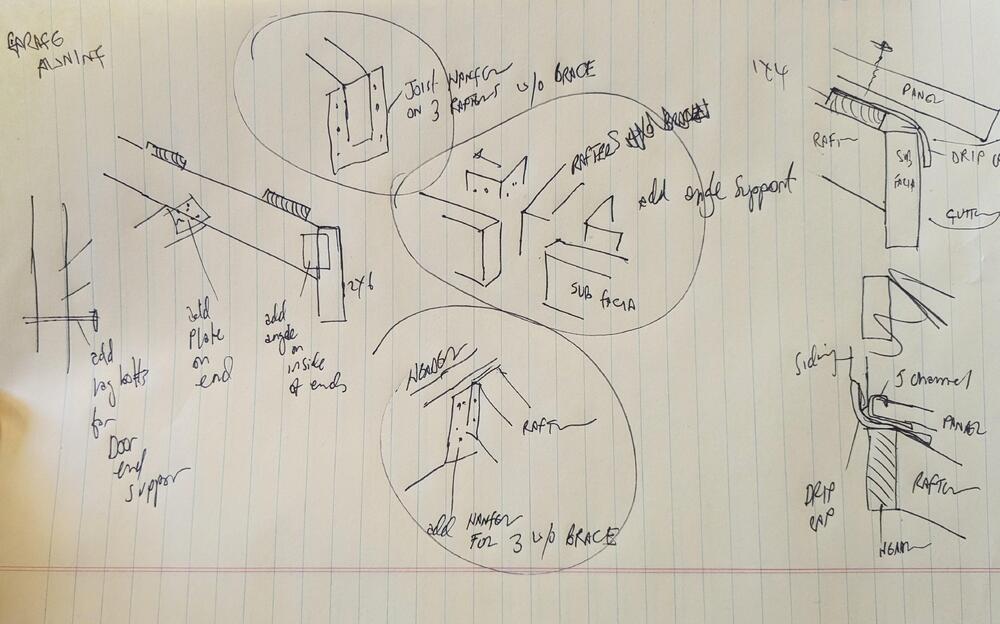


Wondering if I should add hangers on the same 3 rafters at the sub facia, for additional support. I have to add a 4' sub facia on the end - I figured I should add angle brackets to tie the 2 sub facia sections to the rafter, since they sit midway on the rafter end

Steve Thomas
True Classic
I would but I am deeply conservative..! I would have a nail plate or hanger on every joint. Neat solution using the fascia as a beam [which it is] and I should have thought of it. It does mean that end connections to the fascia are responsible for transferring load from the rafters without props to those with. So, yeah, hangers!Wondering if I should add hangers on the same 3 rafters at the sub facia, for additional support
lookforjoe
True Classic
I would but I am deeply conservative..! I would have a nail plate or hanger on every joint. Neat solution using the fascia as a beam [which it is] and I should have thought of it. It does mean that end connections to the fascia are responsible for transferring load from the rafters without props to those with. So, yeah, hangers!
Thanks - credit for the facia goes to a builder on the Z forum - he said that would be the best way to deal with the otherwise unsupported rafters.
I'll add the hangers for those rafters. The roofing itself will only be corrugated steel panels, so not much weight there. We don't get heavy snowfall anymore, so I'm not expecting snow load to be a major concern.
Steve Thomas
True Classic
you read my mind. No snow, ever, in my part of the world so my knowledge in that area is movie based.... so I said nothing. Hollywood not a deep tech ref.snow load

