Fiataccompli
Chris Granju
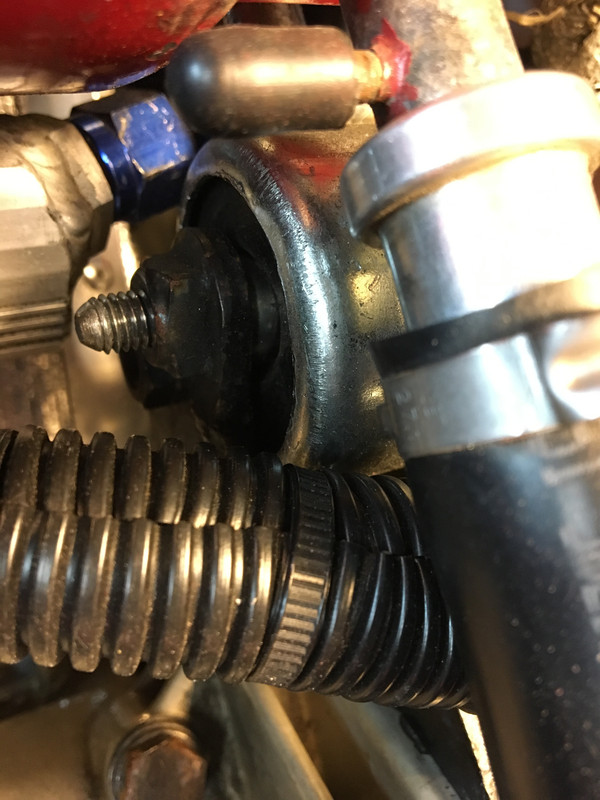
thanks for the follow-up. I have a solid piece of metal as the dogbone in my '85. Oddly, I don't mind so much. I picked up some motor mounts to do this to replace the metal (installed by a PO), but haven't done it yet.

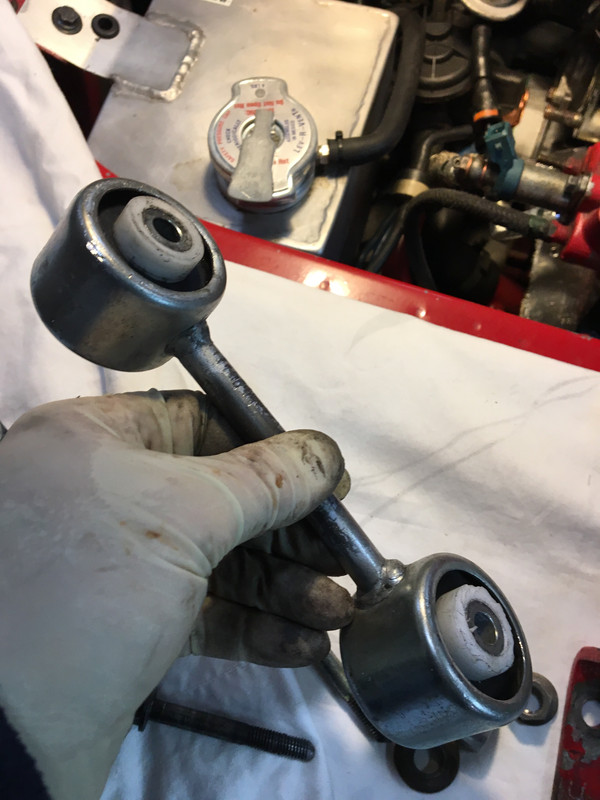
 I want to try this rod for comparison. I ordered a few more of the bushings for my other spare rod. These ones I'll drill first to see if it changes the tendency to split in the center.
By the way, I tried freezing a couple of the rubbers before drilling but really did not notice much difference. The only one I had any trouble with was the first one I drilled. I did not have it anchored to the drill press table (just held it by hand) and tried to drill it too quickly (forced the bit into the rubber), and it grabbed and tore a chunk out. But no splitting, even while installing. So I'm curious if you find any difference by drilling first (that's how I did all of mine).
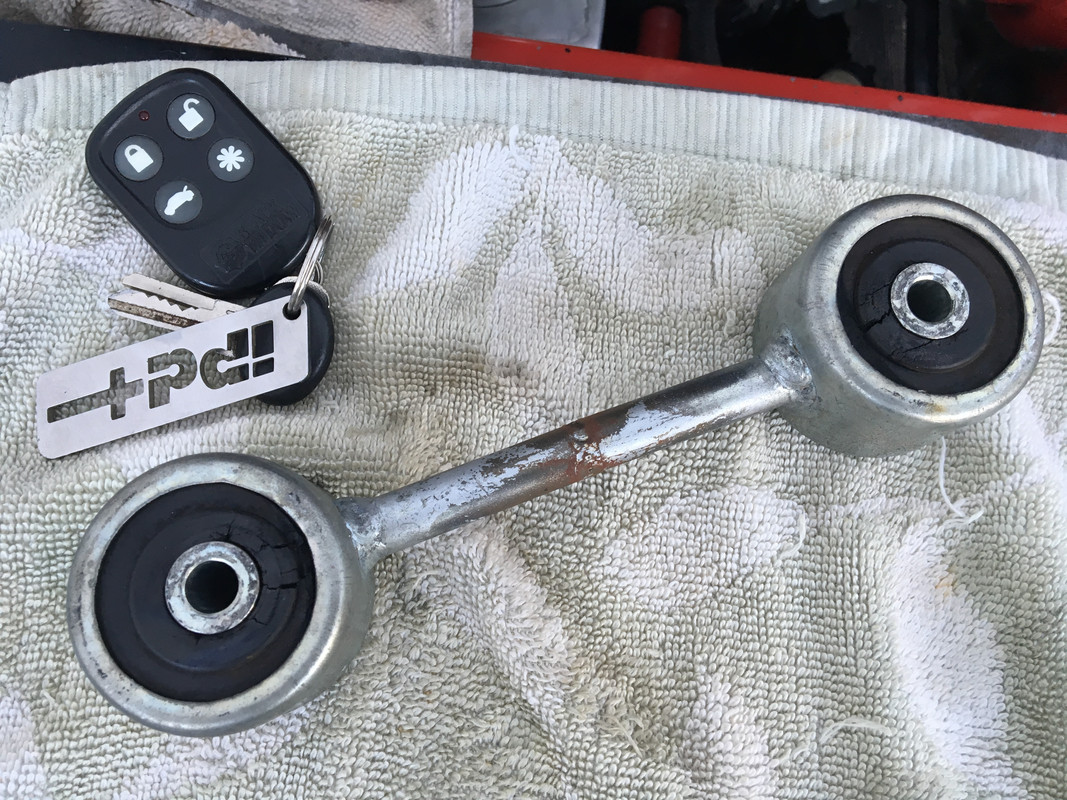
Which edge are you referring to? The rubber bushings I used have square shoulders on both outside edges. Perhaps that is what you are thinking of rounding-off? If so I honestly don't think it will help. They 'squish' enough to go into the metal housing without needing to remove any material. Use some light lube to help maneuver them into position.round off the stamped edge
That might work well, assuming you can find the center of the bushing to drill out once the board is in place. I kind of did the same thing with a large washer:clamping the bushing under a board with 2 clamps
Which edge are you referring to? The rubber bushings I used have square shoulders on both outside edges. Perhaps that is what you are thinking of rounding-off? If so I honestly don't think it will help. They 'squish' enough to go into the metal housing without needing to remove any material. Use some light lube to help maneuver them into position.
That might work well, assuming you can find the center of the bushing to drill out once the board is in place. I kind of did the same thing with a large washer:
It seemed to me that having the bushing well secured to the drill press, and not feeding the bit to quickly, were the biggest helps to prevent damage. Of the four bushings I drilled only the first one had any issues (I did not have it secured and fed the drill heavily).
Please document anything you try and report how it works.
Ahhh, I misunderstood, thought you were referring to the rubber insert. Cleaning up the metal edges would be good but don't remove the lip itself. It helps keep everything in position, and these bushings end up a little narrower than the stock ones so the metal lip has plenty of clearance.I meant to clean up the metal dog bone
Thinking a bit more on this. The poly spacers should keep the rubber centered on the inner metal sleeve. However if the rubber now begins to migrate within the outer metal housing (the round end piece), then the 'half' width rubber bushing would be needed to keep things centered again. Well see.
Also, I wonder if the drilled ID within the rubber (when modified to fit the inner sleeve) could be reduced to make the rubber a tighter fit on the sleeve. Although I really doubt it could be made tight enough to prevent all migration.
Great thoughts....i think that's a very feasible optionPerhaps we are thinking about this problem in the wrong way.
Today many of us have worn rubber bushes in a perfectly good steel mounting. What if we just gave in to the fact what it is not a serviceable part?
Many cars use a “torque strut” to control longitudinal motion of the engine. Could we perhaps find something similar from another car and either get lucky and find one the exact configuration we need (yes even a blind squirrel finds a nut someday) or modify one to the configuration we need?
Toyota and nearly every other manufacturer uses a similar unit to what we have but the ends are at 90° to what we need or they length is wrong but the ends are joined by a simple steel rod or tube. Which suggests that it could be cut and rewelded to make the proper length and clocking.
View attachment 10876
Or in the blind squirrel category, perhaps we find the right length in one of the many aluminum housing based units
View attachment 10877
Perhaps some time spent measuring what we have and then wandering a Pickapart would yield a part(s) we can buy new that could serve our purposes? Modern mounts last a good long time under greater loads and we could always buy a spare to have for the future.
Just a thought.
Nylon spacers are actually very easy. They are available in a large variety of sizes at hardware stores and are very inexpensive. Just get a couple that are the right size (or very close to it). The ones I showed in a prior photo were just some that I already had on hand left over from a prior project. That's why they are too big of a OD for this use, but I wanted to see how they could be used if needed. And it seems they are needed as I suspected. Those came from a local ACE Hardware, but more appropriate sizes are also available in various ID's, OD's and widths. Basically they only need to fill the gap between the rubber (which is narrower than the stock ones) and the body mounting brackets. That will prevent the rubber from creeping off center on the inner metal sleeve.If the nylon spacers are required to keep it centered then once those are fabbed the first time they should be easily reusable with each bushing renewal.