Alternative Engine Swaps...

Back to this....

Sometimes we all fail to stop and "smell the roses". I myself am probably one of the worst. The comment above kept me thinking, so I took a few minutes this evening, stood back, and took a different view of my current project.

Amazing...

The knowledge of knowing what it takes to weld, grind, fit, plumb, wire, analyze, to create, to craft is something in itself. Then you still need to be able to dream, to have dreams shattered, to retreat, regroup and then continue to push forwards when everything else is telling you to lay down cause your a damn fool. And lets not forget trying to explain to others that just don't get it and wonder if YOU actually get it yourself!!!

Each and every one of those aspects listed above can go south in a heartbeat, and often do. It really does take a special skill set to do these types things, especially in combination. More often that not, it takes a much much greater MIND set to achieve such a goal, any goal for that matter. Mind over matter right? If you don't mind, it don't matter.

In the end I guess it's those few and far between times when you actually sit back look at things in a different light, from a different perspective that have the most profound impact on who and what you are. I'm thankful to have the abilities to do these types of things. Probably be lost without em.

I guess in the end I just want to thank you for reminding me of who I am...


Well said and will have to agree on all counts with you.

You are correct... what the hell was I thinking.

TonyK.

Grimsby Ontario Canada.
 
You will need a good fan to move enough air through that unit. X engine bays don’t move a lot of air stock.
 
Back to this....

Sometimes we all fail to stop and "smell the roses". I myself am probably one of the worst. The comment above kept me thinking, so I took a few minutes this evening, stood back, and took a different view of my current project.

Amazing...

The knowledge of knowing what it takes to weld, grind, fit, plumb, wire, analyze, to create, to craft is something in itself. Then you still need to be able to dream, to have dreams shattered, to retreat, regroup and then continue to push forwards when everything else is telling you to lay down cause your a damn fool. And lets not forget trying to explain to others that just don't get it and wonder if YOU actually get it yourself!!!

Each and every one of those aspects listed above can go south in a heartbeat, and often do. It really does take a special skill set to do these types things, especially in combination. More often that not, it takes a much much greater MIND set to achieve such a goal, any goal for that matter. Mind over matter right? If you don't mind, it don't matter.

In the end I guess it's those few and far between times when you actually sit back look at things in a different light, from a different perspective that have the most profound impact on who and what you are. I'm thankful to have the abilities to do these types of things. Probably be lost without em.

I guess in the end I just want to thank you for reminding me of who I am...
Well said and will have to agree on all counts with you.

You are correct... what the hell was I thinking.

TonyK.

Grimsby Ontario Canada.[/QUOTE
 
If you are cool with making the side intakes behind the doors bigger/more functional they would allow for enough air I bet.
 
Love your work
Could you give me more details on the intercooler what model Audi is it from
And how thick is it
Thanks
 
It's very pretty, and the right color :D When I read the post, I thought you meant 'rolled over', and was like, so where's the pic of that :D
 
Are you asking what the stock angle is at full extension? My K20 build is using coil overs from MWB and they do not extend as much as the stock struts do, so that measurement is not going to do you much good. Your picture looks to be much more of an angle than mine are.
 
Hey Roger... Yeah I was looking for the angle at normal ride height.
I took measurements on my '85 "yard art" at full droop and normal ride height.
Full droop was 15 deg, but it looked to be less angle than your pic shows.
The angle at normal ride height is 2-3 deg. It looks like a stock spring, but I don't know if it has been lowered, don't have another to compare it to. Edit; 2-3 deg droop.
Both measurements were taken with car level, at least with the bumper and decklid level.
 
Last edited:
That certainly looks like more than 15 degrees - is that an accurate measurement?

Where do you get CV’s machines like that? Do they produce new CV to spec, or modify existing? Cool resource for sure.

Either way, that is significant misalignment at rest compared to stock. Even if the CV’s are modified to allow significant misalignment, won’t that create a more rapid wear situation?
 
Hey Roger... Yeah I was looking for the angle at normal ride height.
Here is a photo of my K20 project. This is at full droop with the coil overs.
Rear suspension finished 06.JPG


Nowhere near what you are showing. At normal ride height, the control arms are just about level as are the axles.
 
Mystery wire theater again... Traced everything except these few wires... Was thinkin maybe voltage reg? Or maybe cat control unit? HELP!!!

1980 carbed... No a/c... All wiring in engine bay... And just what the hell color is Amber anyways??? Heck the Fiat Orange looks like Brown. I am partially color blind which really makes it fun.


View attachment 17169 View attachment 17170
These are educated guesses based on my reading of my 1980 carb wiring diagram. In the top photo, I think the black/violet and the white/red that come out of the green sleeve goes to the gulp valve electrovalve. In the bottom photo, the two white/reds that are connected go to the gulp valve thermoswitch. In the top photo, the pink goes to the idle shutoff solenoid. The two orange wires that are connected go to the backup light switch on the transmission. The green wires with the small white bands are stumping me. The only wires that I can find in the diagram that are green and double connected are for the AC compressor clutch and fast idle electrovalve. Maybe Fiat just included those in a non-AC car to mess with you. ;) In any case, most likely the only one you would probably be interested in is the back-up light switch wiring.
 
Those miscellaneous wires in your photos certainly look familiar from my '79. It's been too long to remember exactly what they all went to, but the descriptions Rodger gave sound right. I seem to recall the orange one is a double lead because it went to one of the smog device solenoids/valves and then on to the reverse switch on the trans; the two in series. I believe it is a hot wire (?) so be sure to insulate it. I removed a ton of that stuff from the '79. It was a Calif smog spec with AC, so there was every possible device in existence on it. And I believe they wired a lot of the cars for all (or most) of that stuff regardless of need. So you may very well find some wires that had no function on your car.

For the starter lead. I'd have to look at everything closer, but isn't that the connection to the key switch to trigger the solenoid?

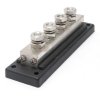
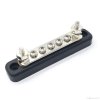
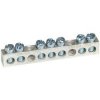
Regarding the multiple grounds. Those star wheels are available new. But personally I don't care for them. I also don't like "push on" spade connectors...I prefer screw down ring terminals. I'm considering my options for improved 'ground' connections like you are. Agree, don't want to stack a bunch up on one post. But I don't mind having a couple together. So I might use something like a small buss bar, with just a few posts. Each post having a couple leads to it. That way the whole thing isn't too big and invasive, but provides good connections for each lead. There are many versions for it, here are some random examples:

fbussbar12black__49138.1310078797.1280.1280.jpg bus-bar-600-amp-hot-feed-or-common-ground-copper-600-amp-rp11105_1.jpg rBVaSlutdoWACmVHAAG3X_aa0J8287.jpg images.jpg

They are available in any number of connecting posts. The ones with a base will need for one lead to go from the bar to a solid chassis ground point, making all of them a ground. The last example could be mounted directly to a bare spot on the chassis for its connection to ground.

Please let me know what ideas you come up with.
 
I can then daisy chain them together and then maybe one 12/14ga wire direct to the battery.
To connect it directly to the battery, one like this style might be best. The large post on the end would be for the heavy gauge lead to the battery:
fbussbar12black__49138.1310078797.1280.1280.jpg
It is available with a cover to clean things up (this happens to be red, but also available in black):
s-l1600 (2).jpg s-l500.gif

And if you did not got to the battery, there is this one. I like how clean and simple it is. The two end mounts would ground it directly to the chassis:
s-l1600 (1).jpg s-l1600.jpg

As you can see, I'm still thinking about what I will use.
 
Back
Top