Performing Honda K24a3/AST5 6spd Conversion

After that, I started to put the drivetrain back in. I'll finish that today

Left out the water feed pipe, otherwise connecting the main power harness to alt, knock & starter is near impossible from the cabin side access. Also removed the AC related plates, as those make a significant difference to the height I have to elevate the chassis. TB is also left off. Alternator & belt are last items to go back in on cabin side. Subframe is NOT attached prior to placement, I find it much easier to focus on drivetrain placement without having to align the subframe mounts at the same time.

PXL_20220812_193709788.jpg


noting left side support bracket positioning to clear subframe

PXL_20220812_195220978.jpg


drivetrain set as far left as possible for 2/3 of the chassis lowering, dropped a few inches at a time, then check all sides for clearance before next drop....

PXL_20220812_200835042.jpg


PXL_20220812_200845578.jpg


...then pushed to the right, drivetrain brace (Astro 5820) added (note, need to add markings for support rod positioning on crossbar), torque mount loosely installed to align drivetrain laterally, EMS harness set through rear bulkhead, clutch slave then heater feed hose, transaxle ground strap installed, chassis lifted & set back on jack stands

PXL_20220812_204733342.jpg


PXL_20220812_220243908.jpg
 
Last edited:
More reassembly today

attach starter/alt/knock harness, install the coolant pipe, plenum support, attach wiring harnesses

PXL_20220813_152917408.jpg


shifter cables, then coolant resv. & hoses
PXL_20220813_175047902.jpg


fuel feed hose, misc wiring
PXL_20220813_175055465.jpg


install subframe. Had to find two shorter M12 bolts for the forward center mount, the ones I had were 2 different types

PXL_20220813_155457257.jpg


motor mounts attached to subframe, then subframe bolted at the forward & rear center points, checking alignment of the suspension mount holes with the subframe. Easier to install the drivetrain first, then set the subframe.

PXL_20220813_175223102.jpg


subframe cut on left could have been reduced at least an inch

PXL_20220813_175202801.jpg


IMG-20190901-114515.jpg

rad hoses attached, simplified heater hose attached

PXL_20220813_175128508.jpg


subframes installed, then drive axles (not shown). CV bolts (6 per) torqued to 30ft/lb

PXL_20220813_183046522.jpg


alternator, AC brackets, AC compressor installed (not shown). I had changed out the AC idler, and unknowingly, the spares I have are slightly larger OD than the original - as a result the SPK1650 serpentine belt didn't fit. Luckily, I had a 6PK1670 from when I was figuring out lengths. That worked.

PXL_20220813_190515249.jpg


hopefully wrap up the install, check fluids, etc. tomorrow.

Finally found where they hide the oil fill spec

Honda Accord manual
Screen Shot 2022-08-13 at 9.52.18 PM.png


Acura RSX Manual

I'm going to assume the K20A2 spec - I've never found it takes less than 5 quarts for regular oil change
Screen Shot 2022-08-13 at 9.40.45 PM.png


...and the correct spark plug NGK 6994 (IZFR6K11) gap

Screen Shot 2022-08-13 at 9.44.43 PM.png
 
Last edited:
Hussein, where are you getting the single conductor wires from? Do you have a supplier. In the current build I am doing for Mike Schofield I will need to be extending the wire harness and prefer to get conductors that match existing colours.

Cruise control on your platform can be done by cable. The Abarth is wheel sensors and the ECU holding an input from the throttle by wire to the ECU command. Too late for me as the wiring for this part of the build that I am doing has been removed. I would need to get into the CAN bus to make this work on my swap. Keep up the posts, very interesting mods.

Thanks.

TonyK.

Grimsby Ontario Canada.
Tony, I have gotten some wire from these folks: https://www.sherco-auto.com/striped-tracer-wire.html it is tinned wire.

They also sell on Amazon: https://www.amazon.com/Primary-Trac...B08S8Z5N39/ref=psdc_495310_t1_B07SDR4MRH?th=1

If that helps from an import cost/shipping standpoint.

There is also another company on Amazon I bought from which sells striped wiring: Jumping Light https://www.amazon.com/JumpingLight...+automotive+power+wire,industrial,272&sr=1-33
 
More reassembly today

attach starter/alt/knock harness, install the coolant pipe, plenum support, attach wiring harnesses

View attachment 64860

coolant resv. hoses, shifter cables
View attachment 64862

fuel feed hose, misc wiring
View attachment 64863

install subframe. Had to find two shorter M12 bolts for the forward center mount, the ones I had were 2 different types

View attachment 64861

motor mounts attached to subframe, then subframe bolted at the forward & rear center points, checking alignment of the suspension mount holes with the subframe. Easier to install the drivetrain first, then set the subframe.

View attachment 64866

subframe cut on left could have been reduced at least an inch

View attachment 64865
rad hoses attached, simplified heater hose attached

View attachment 64864

subframes installed, then drive axles (not shown). CV bolts (6 per) torqued to 30ft/lb

View attachment 64867

alternator, AC brackets, AC compressor installed (not shown). I had changed out the AC idler, and unknowingly, the spares I have are slightly larger OD than the original - as a result the SPK1650 serpentine belt didn't fit. Luckily, I had a 6PK1670 from when I was figuring out lengths. That worked.

View attachment 64868

hopefully wrap up the install, check fluids, etc. tomorrow.

Finally found where they hide the oil fill spec

Honda Accord manual
View attachment 64869

Acura RSX Manual

I'm going to assume the K20A2 spec - I've never found it takes less than 5 quarts for regular oil change
View attachment 64870

...and the correct spark plug NGK 6994 (IZFR6K11) gap

View attachment 64873
Great documentation for others (and yourself :) ) 57 pages so far. Amazing work.
 
Great documentation for others (and yourself :) ) 57 pages so far. Amazing work.
Indeed! Trying to keep the first post updated with the index of work at it transpired, only way I can keep track. I don't remember anything if I don't document it as I do it.

Only a little done today, had plans with the Mrs for the afternoon.

Need to re-work the AC compressor loop - power goes through 2 pressure switches before going to the compressor. Going to replace with better quality connectors

PXL_20220814_143741171.jpg


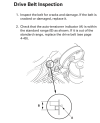
6PK1670 belt - one minor issue with cruise actuator - it reduces clearance off the belt tensioner so I can no longer use a standard 1/2" breaker bar & shallow socket to release it. I ordered one of those tensioner - specific bars with the shallow socket welded in place for future use. EDIT -need to add details on idler pulley.
PXL_20220814_143222466.jpg

PXL_20220814_143505128.jpg

EDIT: based on the reference pic from the shop manual regarding belt tension, I think I need to find. a longer belt, this one puts the marker outside the tightest end of the recommended scale. Existing belt is 1670mm/66.4". I can get a 67" or 67.5" I don't know how to translate approx 1/3" on the tensioner to required belt length increase.

Screen Shot 2022-08-14 at 7.56.13 PM.png

Suspension, brakes & splash shields back on, in that order
PXL_20220814_162120820.jpg

PXL_20220814_162133103.jpg


PXL_20220814_162930903.jpg

PXL_20220814_170053607.jpg


Putting the exhaust back in - since I'm using the stock mls gasket, I wanted to check the flange surface, just as well as it had scoring they didn't remove in production - this is after several go overs with 240 on a long block.

PXL_20220814_171731377.jpg


Not perfect but much better

PXL_20220814_172024604.jpg

MLS gasket
PXL_20220814_172816293.jpg

Header on & torqued to spec of 32ft/lb, after this pic - 3 bolts are not installed here
PXL_20220814_172928820.jpg

I forgot to put one of the VTEC solenoid cover bolts in beforehand, so fixed that next
PXL_20220814_175319266.jpg


Collector in place
PXL_20220814_175825951.jpg


Tensioner spring for slip coupling - Volvo part intended for C30/S40 manifold heat shield pn 30713395

PXL_20220814_180410915.jpg


When I put the coilovers in, I found the right tower was distorted, so BFH was employed to reset it. Only takes a gentle wallop with that. I have the doubler plates, 350/175 progressive QA1 springs & the Ford mounts, the ears had flared out enough from the deformation that it wouldn't go back in as was.
PXL_20220814_180456118.jpg
 
Last edited:
Awesome! Need to see some videos of her when she’s back on the road! 😁

Unfortunately I'm not much good at videos. I'll need to get someone to do that at some point :)

Still wrapping up the re-install.

One issue I had with the exhaust was leaks at the (warped from my welding) V-bands that threw off the O2 readings. I found a eBay store that sells copper gaskets for these, so I had them make me 3 in the stepped 2.5" V-Band size I need - 67x78mm

PXL_20220815_143709212.jpg


coated each with the copper silicone, as per the instructions. Seems unnecessary, however I don't want to do this over

uncoated here, just testing fit
PXL_20220815_143722157.jpg


Exhaust all back together

PXL_20220815_154109678.jpg


PXL_20220815_154221670.jpg


put all the EMS wiring back together, with a couple of revisions to reduce the number of connectors
PXL_20220815_192129056.jpg


checking to make sure the cover I made still fits OK

PXL_20220815_192228045.jpg


ran it after that, after priming the motor to develop oil pressure. I expected it to run without issue, however I'm still surprised when they do :rolleyes:


Ran it for the (Honda) recommended 15 minutes at idle. Checked under for leaks, etc., bled the rad. After that, I just installed the trunk covers & panels

PXL_20220815_232849084.jpg


Mileage at install 4727 (144,410 on vehicle). Note - added about 8 fl/oz of Mtorq trans fluid - I had lost some when I pulled the axles.

PXL_20220816_151749786.jpg


Have to start figuring out how I'm going to mod the TB to accept the 2nd wheel
PXL_20220815_233341766.jpg
 
Last edited:
Congrats. Looks good and sound great.

Certainly not much room for the second bobbin.
How about machining a new pulley with both groves incorporated in to it
Amazing work so far.
Do you have any free space to rotate or move the TB? The easiest solution from where I sit is to rotate the TB 90 degrees if space permits.

None whatsoever.

Underneath. Rotating the TB would put the IACV into the space occupied by the rad hose/ water housing neck, and the TPS into the lower part of the same hose, never mind that it would be unreachable for adjustment.

index.php


PXL_20220816_232202331.jpg

I'm going to mod the bobbin/mount so that it sits closer to the TB -

So far I cut the stop shoulder & the spring.

removed:
PXL_20220817_161131367.jpg
That made a respectable improvement. Now, If I machine out the backside of the stock bobbin's recess area, I'll gain another 1/4", which may well be all I need.

almost there
PXL_20220817_011409449.jpg


recess - I'll remove the shoulder in the center
PXL_20220816_233146819.jpg


note - the new wheel is actually no good, the bore and mount hole spacing is all wrong

PXL_20220816_233206216.jpg
 
Last edited:
Other things - got the spare pan drain port repaired - new threaded bung inserted & welded in place


PXL_20220816_171346638.jpg


HE040 terminals came today, so I wired the 2 sockets for the VSS/cruise signal & WBO2 signal

PXL_20220816_135040582.jpg


Not sure what I was thinking with using the steering hub adaptor for the cruise control panel -without the Acura contact reel, there is no way to run the wires. I can't make a three-contact ring that would fit in with the existing horn contact.

PXL_20220816_202620318.jpg


so, it's gonna go under here

PXL_20220816_202609545.jpg
 
Last edited:
Very cool dash and gauges

Thank you - that was another involved project :)

I got the wheel machined this morning, and a shoulder removed from the hub, so that the wheel sits inboard.

I used the original wheel as a drill guide to re-drill the new incorrect one, after it was reduced, which made it pretty easy to achieve
PXL_20220817_140102725.jpg


shoulder removed. Two things - I had to reset the throttle stop after it was all back on the car - the plate was sticking shut & hanging, and initially the spring tension was too soft & wouldn't pull the cable back. See how that goes DTR

PXL_20220817_140059762.jpg


revised hub depth - replaced the screw/locknut with a grub screw

PXL_20220817_140207376.jpg


wheels in place, spaced with a couple washers

PXL_20220817_145338627.jpg


outer wheel sits pretty much where it did originally

PXL_20220817_145345934.jpg


therefore throttle cable bracket doesn't need to be altered

PXL_20220817_145746168.jpg


clearance. When we get back from Montreal/Quebec City in a week or so, I'll figure out the cable routing & bracketry.

PXL_20220817_150608302.jpg
 
Last edited:
Safe travels. Nice way to cap the summer.

I will be going to Vermont in a week, can’t wait.
 
Safe travels. Nice way to cap the summer.

I will be going to Vermont in a week, can’t wait.
Thank you, Karl. We just arrived in the Eastern Townships, checking out the cheese farms :)

Have a great vacation in Vermont. We saw a good bumper sticker on our way through VT, on a car with VT plates: "Vermont Sucks - Tell Your Friends" 😁
 
Thank you, Karl. We just arrived in the Eastern Townships, checking out the cheese farms :)

Have a great vacation in Vermont. We saw a good bumper sticker on our way through VT, on a car with VT plates: "Vermont Sucks - Tell Your Friends" 😁
Growing up the milk from the cows I milked went to Cabot Creamery in the next town over. Although not artisanal it is still good cheese.

FYI cheese does not smell good when they are making it…
 
Back
Top