K20 project off to a good start, volume 2

The way the vent windows come on the car, there is a small piece of triangular black vinyl stuck to the window underneath the triangular plastic cover plate in the front corner. This hides the dirt that gets under that plastic piece from being seen from the inside. I didn't have any black vinyl, but probably some from a local sign shop would work, if they were open now. I decided to try just spray painting the glass black to see how that worked and just masked off the area using the plastic cover as a guide. It came out pretty good.
Vent window channel assembly 03_resize.JPG
Vent window channel assembly 04_resize.JPG
Vent window channel assembly 05_resize.JPG
 
Wow, wow, wow. @Rodger - I think I need to just drop my (painted) doors off at your place and have you refurbish them. You really have outdone yourself on this one for sure.

As I mentioned in my hinge-work thread, I've started in on my doors. Earlier I already disassembled the parts car doors. There is a lot going on in those doors, so for the actual car I decided to leave well enough alone. My current plan is to just tape/mask off the windows etc and have the body shop give it a coat but having this kind of treatment would be soooo much nicer. Not sure I could afford to have you do similar work to a car that is not yours tho...

Looks good, keep it up and keep posting!
 
I took a little detour from working on the doors to tweak the exhaust. Although it was much better with the chambered muffler and resonator, it was still a bit louder than I would like. I had seen someone post about an exhaust insert here on the forum quite a while back, so I thought I might give that a try. I ordered a Car Chemistry one from Summit Racing. https://www.summitracing.com/parts/cci-3di25r
Exhaust insert 01_resize.JPG

Exhaust insert 02_resize.JPG

The photos are of it after I already started whittling on it. I thought it was supposed to go in the tailpipe, but Car Chemistry says it is best inserted just after the collector of the exhaust header, ideally after the catalytic converter. Well, no way that can happen with the 180 degree bend between the cat and the muffler, so I decided to try after the header. I disconnected the exhaust at the V clamp and figured that I could get at least two of the rings in. The three ring version is for street cars, but they sell a two ring version for racing cars with no mufflers, so I figured two would be better than nothing. They also say that you can pack some muffler packing or stainless steel wool in between the rings if you want to quiet the exhaust down even more, but I didn't try that yet. Because they are designed to fit into a straight exhaust pipe, it wouldn't go past the V clamp flange as that had a slightly smaller ID. Plus the exhaust starts to curve soon after the clamp. I couldn't put it into the header side of the system because the O2 sensor was there. While I had it apart, I noted a slight exhaust leak at the clamp, even though it was very tight.
Exhaust insert 06_resize.JPG


Here is the insert after I got done carving it down to fit into the exhaust.
Exhaust insert 04_resize.JPG

I tapped a small hole for an M6 retaining bolt so it wouldn't get loose and start rattling.
Exhaust insert 05_resize.JPG

I used a little high temp copper sealant on the V clamp to see if that would eliminate the small leak and put it all back together. I let the sealant set for 24 hours, then took it out for a drive. I felt that it did make enough of a difference in the sound level to bring it down to a better level for me, so I felt it was worth the effort.

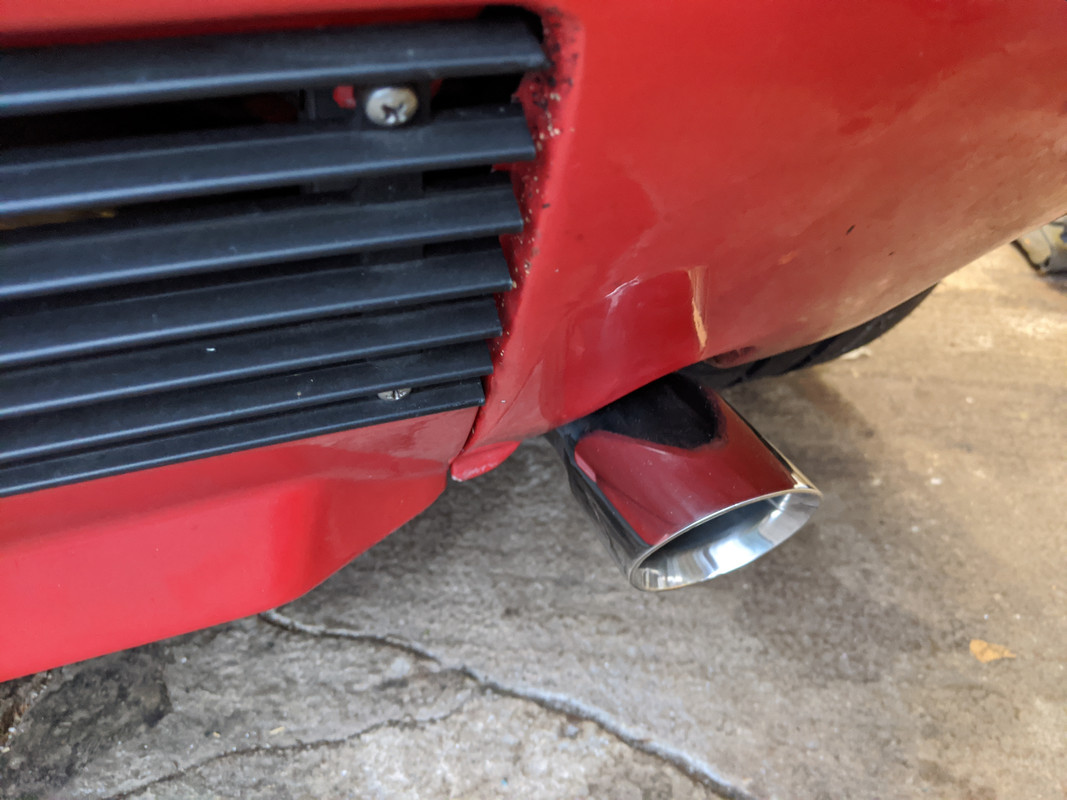
When I first got it, I thought I would try to put it in the tailpipe and see if that made any difference. To do that, I had to cut off the chrome tip that I had tack welded on. I found that it didn't seem to do much in the tailpipe, so that is why I put in after the header. One of the things that happened when I redid the exhaust system, is that the stick out of the chrome tip the second time, didn't seem as much and I thought it was a too short at that point. The tips came as a pair, so I still had one that was the original length as I had cut one down for my first go round. I put the original length one on and am trying to decide if I like the longer look or if I should shorten it some. Here are a couple of views of the new tip. I realize that car aesthetics are a personal thing, but thought I would get some opinions from the X crowd as to the length of the tip currently. Feel free to weigh in. This time I fixed it with a couple of set screws so it is easy to remove and modify.
Exhaust tail pipe 2nd 01_resize.JPG
Exhaust tail pipe 2nd 02_resize.JPG
 
I recall playing with baffle inserts on my Volvo. Not fun. I only put them post-muffler, so that is likely a reason I had so much trouble getting the drone gone. Makes sense to put it pre muffler. I hope it has worked out for you.

I would have to say this tip protrudes to far

index.php


This is as far as mine protrudes, mind you, I have no bumper

IMG-20200226-172322.jpg
I like your tip a lot. Where did you get it? I agree that I think mine sticks out too far.
 
I like your tip a lot. Where did you get it? I agree that I think mine sticks out too far.

Its from Redtailperformance. Can't find the invoice, pretty sure it's this one: RTP-039 - many of them are to large OD for the Fiat opening.

I have a question for you - I don't recall, but did you also use just three mounting points for the AC compressor? I ask 'cos mine has stress cracked the rear mount in this location after only 400 miles. I'll have to pull it & weld/reinforce that mount ear, but it seems that it's not happy with only three mount points :(

CompressorStressCrack.jpg
 
Even if the quality wasn't there, I always liked the look of the Ansa tips, especially theses ones. Just one will do the job also!
TTbcP1BKTg5TWwVZ_8xPahBVtjgeHZnzwK9tftFcZORtgxuJFICwS8qRH7T-ZA11Gt2gfuw6Izzc0dXujyM6cC04HQ
 
I have a question for you - I don't recall, but did you also use just three mounting points for the AC compressor? I ask 'cos mine has stress cracked the rear mount in this location after only 400 miles. I'll have to pull it & weld/reinforce that mount ear, but it seems that it's not happy with only three mount points :(
Yes, mine is also mounted with just three ears but I only have about 40 miles on mine so I don't think there are any issues. Of course, mine is really buried so it is not easy to see. I will keep an eye on it, though. I'm wondering on yours if there is some stress on that back ear from the bolt through the mounting point not being totally passive. If is not, then just the tension on the bolt may be why the ear is cracking. Cast aluminum doesn't really flex. It would seem to me that if there was going to be an issue with an ear cracking due to stress, it would be one of the front ones as that is where the tension on the pulley is.
IMG_0252.JPG
 
Yes, mine is also mounted with just three ears but I only have about 40 miles on mine so I don't think there are any issues. Of course, mine is really buried so it is not easy to see. I will keep an eye on it, though. I'm wondering on yours if there is some stress on that back ear from the bolt through the mounting point not being totally passive. If is not, then just the tension on the bolt may be why the ear is cracking. Cast aluminum doesn't really flex. It would seem to me that if there was going to be an issue with an ear cracking due to stress, it would be one of the front ones as that is where the tension on the pulley is.
View attachment 31164

I'll have to check - I don't recall in what order I tightened the three bolts - so perhaps there is an alignment issue that is creating tension on that rear bolt. If I undo it, it should come out freely without binding in the ear, that way I will know.

The exhaust tip does taper, I have it set so the flare is at the opening. My opening is the stock size. Do you mean your exhaust has a fair degree of movement at that end?
 
I'll have to check - I don't recall in what order I tightened the three bolts - so perhaps there is an alignment issue that is creating tension on that rear bolt. If I undo it, it should come out freely without binding in the ear, that way I will know.
The other thing to check is the flat surfaces where the mounting boss meets the compressor ear. If that is not perfect, then stress will happen when the bolt is torqued.
 
The exhaust tip does taper, I have it set so the flare is at the opening. My opening is the stock size. Do you mean your exhaust has a fair degree of movement at that end?
Ah, now that I look closer at your photo, I can see that the narrow part is in the opening and the flare is past the fender. Nice. I think I will order one. :)
 
Ah, now that I look closer at your photo, I can see that the narrow part is in the opening and the flare is past the fender. Nice. I think I will order one. :)

You'll like it. Very nice quality piece. I'll have to check the mating surface, thanks for the suggestion.
 
Wow, wow, wow. @Rodger - I think I need to just drop my (painted) doors off at your place and have you refurbish them. You really have outdone yourself on this one for sure.

As I mentioned in my hinge-work thread, I've started in on my doors. Earlier I already disassembled the parts car doors. There is a lot going on in those doors, so for the actual car I decided to leave well enough alone. My current plan is to just tape/mask off the windows etc and have the body shop give it a coat but having this kind of treatment would be soooo much nicer. Not sure I could afford to have you do similar work to a car that is not yours tho...

Looks good, keep it up and keep posting!
After the last few days of working on the doors, I have come to the conclusion that you are right, you could not afford what I would charge to refurbish and put your doors together again. ;) These have been a lot of work! :eek: Lots of futzing for sure.

Got the new fuzzy strips on both the '81 and '79 inner trims.
Inside door trim with new fuzzy.JPG


Installed the rear window channels and the vent window/channels. After studying the shop manual, I was finally able to puzzle out the correct path for the window winder cables as my disassembly photos did not capture that detail.
Door assembly 01.JPG


Installed the window and connected it to the cables. This was where a lot of the futzing came in. First I had to adjust the rear channel, then adjust the position of the window on the cable for it to track completely up and down, then adjust the vent window channel to keep the window in it at full up. After I thought I had it right, then I put the top on and found that I had the vent window channel too high in the door, so it wouldn't shut. :( More adjusting and futzing to get it right. But finally!
Door assembly 02.JPG
Door assembly 03.JPG


Took it for a drive to make sure everything felt ok with the roof on. Did some more fiddling with the weatherstripping on the roof to get a better seal to the top of the window. Tightened all the adjustments, added the rear view side mirrors, then made some new inner moisture barriers (not sure what they are really called) as the old ones were pretty sad. I had one good set to use as a template to make new ones out of some large heavy duty construction garbage bags.
Door assembly 05.JPG
Door assembly 06.JPG


Of course, I forgot to put in the inside door lock rod, so I had to make a small hole in my new barrier to slip that in, then repaired it with a small piece of plastic. Installed the door cards and the window crank handle, door release trim and the arm rest. Added the inner trim strip with the fuzzy and the hidden little screw near the rear that holds it on and done! Only thing left to do it finish the outside trim piece with new rubber.
Door assembly 07.JPG
Door assembly 08.JPG
 
Nice work, Rodger. I feel your pain with the business of playing with all the window/fixed glass adjustments, and then finding that the targa doesn't fit. etc., and having to do it all again. The door cards & seat combo look really good!

I'm not sure about the attachment of your drip protection. On my '87, the original drip guard was inserted inside the inner door skin, folded over the top edge, with the inner glass seal / door card retainer on top of it. From there, it was draped to the bottom inside the inner skin, with bolt holes for the window regulator attachment.

My experience is that when I redid it the first time (years ago) and just taped the drip guard to the outside of the inner skin, rain water came out the bottom of the drip guard, behind the door card, and onto the inner sill. It looks like you taped yours completely along the bottom edge, however I think that will mean moisture/water will accumulate between the barrier & the inner skin.

What I did this time around, was to match the original layout, but use two overlapping pieces so I could bring the door lighting through without cutting holes. You can see where the drip guard comes over the top of the inner door skin & then is taped on the inside

IMG-6659.jpg


This is the original drip guard, which had several tears, but you can see how it's tucked behind.

X19-0745.jpg
 
My experience is that when I redid it the first time (years ago) and just taped the drip guard to the outside of the inner skin, rain water came out the bottom of the drip guard, behind the door card, and onto the inner sill. It looks like you taped yours completely along the bottom edge, however I think that will mean moisture/water will accumulate between the barrier & the inner skin.
The photos don’t show it, but I copied the original skins exactly. There is a large inner flap attached to the large skin that’s attached to it about half way down. It goes through the large opening and between the rod from the door release and the window and its cables. It extends all the way to the bottom of the door inside so that will direct water away from the inside of the card. There is also a smaller flap that is in one of the photos that goes under the vent window and hangs down inside over the window regulator. I don’t have courtesy lights so no issues there. Considering that this car will rarely if ever see water, I should be good. Thanks for the comments, though. BTW, I ordered to exhaust tip.
 
Back
Top